Tuesday, May 06, 2014

Time to Play!

All packed up and ready to go!
     One of the highlights of CNCH 2014 was the chance to take a marvelous 12-hour class with Robyn Spady. Robyn is a great teacher and her class, Exploring Weave Structures On a Single Warp, was an opportunity to do something I haven't taken the time to do in many years: play. I related getting ready for CNCH--registering for the class, warping the loom, etc.--in my last post, so I'll simply pick up the story from there.
     I was a little surprised when my loom, my big box of tools, bobbins, shuttles, and extra stuff, and I made our way down to the appointed "classroom." Fortunately, the conference committee set aside half of the upstairs ballroom for the class, and we needed nearly every bit of the space--there were 31 students, all with some type of multi-shaft loom! I've never seen so many different brands and types of workshop looms in one place at one time--table looms, floor looms, four shafts, eight shafts, name a brand or style, and it was probably represented in that class. Everyone had one of four different threadings, and we each wove at our own looms the entire class, so it was fun to occasionally walk around and see what other people were weaving.
Twill patterns (white)
and waffle weave (red)
     Robyn, equipped with a microphone and an LCD projector, took us through the different weaves in our handout materials: a well-written, well-illustrated 100+ page book. We started off with easy patterns based on huck lace, moved through waffle weave, and on to twills, before class ended Friday afternoon. I appreciated the simple patterns, as they're nearly second nature, and I had time to re-acquaint myself with weaving with a boat shuttle.
     Saturday morning found nearly everyone at their looms by 8:00 a.m., an hour before class was scheduled to start. Once Robyn arrived, we began with overshot designs ("Periwinkle"), learned about weaving on opposites, and spent a bit of time on weaving Monk's Belt before breaking for lunch. It was during this session that I discovered why so many workshop looms have trays attached to the breast beam--I had to keep juggling two boat shuttles, either on my lap or on the cloth, as I was weaving. Add one more thing to the shopping list for the Gilmore. After lunch, Robyn launched us into the more complex structures, with more complex tie-ups. Weaving Swivel took the rest of the afternoon--it's a beautiful weave, appropriate for fancy upholstery fabric (the back has long floats), but it required repegging all eight treadles. I spent 25 minutes lying on the floor under the loom, moving the pegs around, for five minutes of weaving.
We have achieved corduroy!
     Sunday morning came too quickly, and I jumped on as many designs as I could manage before our time ended at noon. I was desperate to try my hand at weaving corduroy, so I skipped a couple designs, set the tie-up for corduroy, grabbed a stick shuttle (for the pile weft), and dove in. Corduroy is a weft pile fabric (velvet is a warp pile fabric), with the height of the pile determined by the length of the weft floats. The floats don't pull out easily because in between each pair of pile weft shots, there's a tabby shot to "lock" them in. Robyn had a carton of hanks of embroidery floss in a rainbow of colors, so I selected two hanks of green that were close, but not identical , then wound them together on the stick shuttle. It was a little precarious--I was juggling both a large stick shuttle and a boat shuttle--but I wove 1.5 inches of the corduroy cloth, then took a quilter's chenille cutter and carefully sliced through the weft floats. A tiny bit of fluffing up, and voilá--I had created corduroy.
     After the corduroy triumph, I had time for one last sample--doublefaced cloth--before it was time to pack everything up and attend a guild meeting. I managed to finish 23 of the 28 samples for the class during the time alloted, and probably could have done them all had I been working with one of the four-shaft threadings. However, it was a great opportunity to play around with an eight-shaft point twill threading, and it reminded me of the importance of play time to keep the creative juices flowing.

The entire sampler.

Thursday, May 01, 2014

A Busman's Holiday

     The Conference of Northern California Handweavers (CNCH) was established in 1953 to further the art and appreciation of the craft of handweaving. As the umbrella organization for the fiber arts guilds in Northern California (from California's Central Coast to the Oregon state line), CNCH is tasked with holding a conference every year for fiber artists. Over the years, this mission has evolved into a biennial "conference" (held in even-numbered years) and an "alternate" retreat (held in odd-numbered years) that rotates among the five different geographic areas. 2014 is the year Area 5 (North Bay to Oregon) guilds hosted the full conference, which was held last weekend.
     I was looking forward to CNCH2014, as I had helped behind the scenes at CNCH2012 and hadn't taken any classes. This time, I was taking a class, and when Exploring Weave Structures on A Single Warp, taught by master weaver Robyn Spady, was announced, I was On It. When registration opened on November 1, I had my class registration completed and my hotel reservations made within the first 10 minutes. About six weeks ago, Robyn sent out instructions on how to warp our looms, and I spent last weekend winding a warp and dressing my workshop loom in preparation for the class. On Thursday afternoon, I--along with my suitcase, my loom, and a tote bin full of supplies--were dropped off at the Oakland Convention Center Marriott. I checked into the hotel a day early, to give myself time on Friday morning to do a bit of shopping before my class started at 1:00 p.m.
     Conference, for me, is a bit of a "busman's holiday." For those unfamiliar with the term, a busman's holiday is when you do something on the weekend that is very similar to what you do for a living. As I'm a fiber artist and weaver, spending the weekend at a conference about fiber and in a class, weaving, can seem pretty boring. For me, however, it's a chance to see people that I rarely see in person, make business contacts with vendors, and (most important) play.
     The Marketplace, though small when compared to a gargantuan expo such as Stitches West, was so laser-focused on weaving and spinning that it took me the entire morning to tour it, and I still didn't see everything. I had an opportunity to talk to the maker of my workshop loom about some modifications and upgrades; a chance to buy another end feed shuttle (because one EFS is never enough); picked up a bunch of nice hemp yarn from an Idaho vendor who I normally only visit online; and got to test-drive AVL's latest loom. I also got to visit with people: people I knew from previous conferences; fellow guild members; and online friends and acquaintances I finally met in real life. The time flew by, as did the entire conference: between classes, a banquet, a fashion show, and a couple meetings, I was on the run until I got home on Sunday evening.
     In spending some time interacting with the wider fiber arts community in real life, I also noticed some interesting developments. The most interesting (and a little scary) is that, for better or worse, I have a little bit of fame/notoriety in the fiber arts community. I was stopped several times by people I didn't know who said,"I'm so-and-so. You answered my questions on Ravelry. Thanks, the information was a big help." It's a little bit disconcerting, but also nice to know that I might have helped someone. This also means that people Know Me, and I have to be on my best behavior: I can't be the cranky, irritable old trout that I sometimes can be (especially if I haven't had any coffee), as it can put people off. I also need to "schedule" a lot more time to interact with people, so I don't have to cut them off because I need to be someplace else.
     All in all, it was a lovely weekend. I came home physically tired, but creatively energized, and ready to tackle my work once again.

(NOTE: I'll relate my experiences in the weaving class in my next post. Stay tuned...)

Monday, April 14, 2014

The Book List

I am a bookworm. I've always liked the worlds reading creates and, when I was a kid, my favorite afternoons were spent with my nose stuck in a book. My tastes in reading were--and are--pretty eclectic. You name it, I read it: history, biographies, fairy tales, mysteries, science fiction, trashy romances...you get the idea. I was fortunate enough to fall in love with and marry another bookworm, so we live in a house full of books. If it's true that "books are friends," then we have a great many friends--upwards of 5,000 by my rough estimate.

Presently, space and time are conspiring to keep me from acquiring more "friends": we really don't have space for any more "dead tree" (print) books, and working as an artist means I don't have the time to curl up with a book the way I could when I was a child. However, technology has come to the rescue! The result has changed my book buying and reading habits.

I've discovered that I can get the Los Angeles Public Library (LAPL), one of the truly great library systems, to store reading materials for me. I've always loved the LAPL, spent many happy hours in the downtown Central Library doing research, and was heartbroken when the library suffered a series of horrendous fires in 1986. I discovered last year that: 1) the LAPL has a really large collection of e-media (including e-books, e-magazines, and audiobooks) that can be downloaded onto any computer or electronic device (e.g., iPhone, iPod, tablet); and 2) you don't have to live in Los Angeles County to have a LAPL library card. I got my library card while in Los Angeles one weekend, and it's been very well used--it's now normal for me to have a couple e-books on my iPad for "bedtime reading," and three or four audiobooks on my iPod.

Yes, audiobooks. They've changed my reading habits. Audiobooks have been around for years, but I wasn't usually a fan--I like being able to pick up and put down a book, to go back and reread passages if I think I missed something, and to see pictures and diagrams. Then, I discovered I could listen to podcasts and audiobooks while working at tasks that didn't require close attention, and I started chewing through audiobooks the way I once chewed through regular books.

I started a list of books I've "read" at the beginning of the year. It's an interesting task that lets me see how much I'm reading, and where my curiosity is taking me. I'll update the list periodically throughout the year.

Goodman, Beverly. Shaker Textile Arts.
Goodwin, Doris Kearns. The Bully Pulpit: Theodore Roosevelt, William Howard Taft, and the Golden Age of Journalism.
McCullogh, David. The Johnstown Flood.
Ambrose, Stephen. Nothing Like It in the World: The Men Who Built the Transcontinental Railroad, 1863-1869. 
Goodwin, Doris Kearns. No Ordinary Time: Franklin and Eleanor Roosevelt: The Home Front in World War II.
Abbott, Karen. American Rose: A Nation Laid Bare: The Life and Times of Gypsy Rose Lee. 
Brand, H.W. A traitor to His Class:The Privileged Life and Radical Presidency of Franklin Delano Roosevelt. 
Krakauer, Jon. Three Cups of Deceit.
Brinkley, Alan. The Publisher: Henry Luce and His American Century. 
Ball, Edward. The Inventor and the Tycoon: A Gilded Murder and the Birth of Moving Pictures. 
Gaiman, Neil. Neverwhere.
Brinkley, Douglas. Cronkite.
Sherwin, Martin & Kai Bird. American Prometheus: The Triumph and Tragedy of J. Robert Oppenheimer. 
Feynman, Richard. The Meaning of It All: Thoughts of a Citizen-Scientist.
Krauss, Lawrence M. A Universe from Nothing: Why There is Something Rather than Nothing.
Feynman, Richard. The Pleasure of Finding Things Out: The Best Short Works of Richard P. Feynman.


Thursday, March 27, 2014

The Producer

Twenty yards of finished wraps,
ready to go to the customer.
Last week, I mentioned the 25 yards of baby wraps on the loom. They shipped yesterday.

My bread and butter right now is coming from weaving baby wraps. What are baby wraps, you're wondering: basically, four to six (or more) yards of 28-inch wide handwoven fabric, hemmed at each end. They're basically longer, updated versions of the rebozo, that indespensible shawl worn for centuries by Latin American women. There are a couple of companies that mass-produce these things (MobyWrap is the best-known), but there's a real desire for handwoven wraps, primarily because they have finished selvedges (something lacking on 90% of the fabrics made today). Custom designs are even more popular, as customers can buy exactly what they want...if they have enough money. They are, for all intents and purposes, the wedding dress of motherhood.

The design:
Erin's Rainbows
It turns out, I'm pretty good at weaving baby wraps. I have the necessary equipment, namely, a really big loom with a really big sectional warp beam, and an AVL warping wheel, so winding a 20-30 yard warp onto the loom is not difficult. I don't mind the tedious work of weaving 20-25 yards of plainweave--it's boring, but that's what audiobooks are for. I produce beautiful selvedges--important when this cloth can't have turned selvedges. I weave pretty fast. And, I have the design sense and patience to work with a customer to take her ideas and turn them into a working design.

Erin's Rainbows: On the loom
I see a lot of weavers dive into weaving baby wraps, and nearly as many jump back out of that particular pool, once they discover the amount of time and level of tedium involved in production weaving. It is, quite frankly, a lot of work for not a lot of money. I keep my prices toward the mid-range of what production weavers charge, as I like the idea that someone who might never buy art is getting a piece of artwork (I do consider creating textiles to be "art") for a few hundred dollars. At that rate, I'm making enough to cover my costs, along with a small (just above minimum wage) wage for myself. Instead, I get "paid" in the satisfaction of working as an artist (it beats teaching any day), and seeing my artwork make people happy.

Erin's Rainbows:
The finished cloth
.
Now, I have to get back to work, as I'm starting to wind another warp, for another batch of baby wraps.


Thursday, March 20, 2014

A Question of Balance

The current warp: 25 yards of
rainbow baby wraps
I can't believe it's Thursday already--it seems like yesterday was Monday. I'm in the middle of a long warp that I want to get off the loom by Saturday, and it seems the clock and the calendar are racing along whenever I turn my back.

I should be further along on this warp, but last weekend was spent away from the loom, and the studio, on the "other" part of being "an artist"--seeing, being seen and promoting myself. For me, finding the balance point between working and being "out there" is the most difficult aspect of my life right now. It's tough: I need to be in the studio to create, but when I'm in the studio, I'm a recluse. When I go out, people remember that I'm here, and they want to see my stuff, but I'm not producing anything for them to see. That balance point is somewhere, but it seems elusive.

Katie & Chris Vardijan of The Hub
Friday night was the second Downtown Vallejo Art Walk and it was, by all reckoning, a success. The weather was perfect--a balmy evening with no breeze--and a lot of artists' studios and galleries were open to the throngs of people strolling up and down both Georgia and Marin streets. We walked the entire area, stopping to chat with friends and acquaintances, pausing to take photographs of the event and attendees, and seeing what artists had on display. I was buttonholed by two different gallery owners about possible future shows. The Art Walk is turning into a monthly opportunity to connect with the larger community of artists in Vallejo. It could also turn into a monthly "pop-up" sales venue, but I need to get far enough ahead to have something to sell.

Shannon O'Hare of
Obtainium Works
and  Angie
After a guild meeting in Napa on Saturday morning and a bit of shopping (I do need to occasionally buy food to eat), it was back to Vallejo and then off to Obtainium Works for their St. Patrick's Day Anniversary Party Fundraiser. Obtainium can be best described as an "artists' collective" that particularly like to build weird and wonderful vehicles ("art cars") and contraptions that are frequently seen at Maker Faires and Burning Man. I am only peripherally involved--mostly, I send Stephen off to work on projects on Sundays while I get a few hours of work in the studio accomplished--but I really like the Obtainium artists, and I have a lot of fun at their events. At this event, I helped out at "the gate," selling dinner and drink tickets. I like doing this, as it gives me a chance to talk to everybody without having to go up and introduce myself. I'm also very, very good at it: my goal is to separate people from their money as nicely as possible. I chatted, joked, smiled, and charmed people into buying dinner and drink tickets, all the while having a marvelous time myself. The food was good, the entertainment was spot-on, and the entire event was a rousing success.

"But, you could have worked on Sunday," you're thinking. Perhaps, but it was time to drive back up to Napa and pick up wines from Saintsbury, along with trying what bottles were open (an excuse to spend some time sitting in the sun, enjoying the garden at the winery). After collecting our wines, we stopped by the Oxbow Public Market to try the Mare Island Brewing Company's inaugural product, Saginaw Golden Ale (a bit more hoppy than I usually drink, but very refreshing), then got lunch at Gott's. By the time we finished, it was late afternoon, we were both tired and crammed full of food, and wanted nothing more than to become couch potatoes for the evening.

So, that was the weekend. Lots of fun, some good contacts made, friends reassured that I was still alive, but no work in the studio accomplished. Now it's back to the "real" work of being an artist: throwing a shuttle.

(Photos by SNJacobson)

Tuesday, March 11, 2014

Stitches: It's Not What You Think

stitches (plural noun)

  1. a loop of thread or yarn resulting from a single pass or movement of the needle in sewing, knitting, or crocheting.
  2. a sudden sharp pain in the side of the body, caused by strenuous exercise.
  3. a really big fiber- and needle-arts trade show.
For the first time in several years, I went to Stitches West last month. For those unfamiliar with the name or event, it is one of four big conference/trade shows put on by XRX Publishing (of Knitters magazine) across the United States at different times of the year. Stitches West is held at the Santa Clara Convention Center each February, and is extremely well-attended by West Coast knitters, crocheters, and other fiberistas.

Handpainted superfine Merino/silk
from Redfish Dyeworks
I hadn't been to Stitches for several years--when I was still teaching, late February was a time when grade reports were approaching. I wasn't interested in taking any classes, but a day (or two) at the Stitches Marketplace would only hurt my wallet, so I purchased a two-day Marketplace pass and made my plans to drive down. I really did this "on the cheap": I packed a lunch and a couple of bottles of water, filled up the car, and I was off on Friday morning to spend the day checking out what the Marketplace had for sale.

My first surprise was when I arrived at the Convention Center. I got there only 15 minutes after the Marketplace opened at 10:00 a.m., and already the "close-in" parking structure was full; we were directed to the secondary parking structure, on the other side of the creek and directly across Tasman Boulevard from the nearly-finished Levi Stadium. I parked the car and walked back to the Convention Center, and stepped into a shopper's paradise of yarns, needles, more yarns, patterns, spinning wheels, needlework-related tchotschkes, and still more yarns. Nearly 200 vendors from all over the U.S. and Canada had spread their wares for the delectation of the yarn-mad masses. Heaven!

"Shadow," a 10-pound
Rambouillet fleece I'll scour
this week.
I went all the way to the far back corner of the Marketplace and began working my way forward. Almost immediately, I noticed how the wares had changed since my last visit to Stitches. Last time, nearly all the vendors were focused on catering to specifically the knit/crochet crowd, with lots of millspun yarns, needles, hooks, patterns, and books. Since that time, there's been a lot of "cross-pollination" in the fiber arts community: knitters now spin; spinners have taken up weaving; and weavers are finding joy in knitting or crocheting. As a result, the vendors and what they are selling has changed. I was surprised to see a number of the vendors I normally see at the Black Sheep Gathering, and Stitches felt more like what I remember weaving conferences being like a couple decades ago, with something for nearly everybody. I ran into a number of friends and acquaintances, and managed to get through the entire Marketplace in about six hours before going back and helping a friend with her booth the rest of Friday and all day Saturday.

Handpainted BFL top
from Kitty-Rabbit Kreations.
Of course, the question is always, "What did you buy?" My answer this year is "Some of this and that." I was very good in the Abstract Fiber booth, and got only a "snack pack" of different dyed tops, and only two braids of handpainted top (one from Kitty-Rabbit Creations, the other from Redfish Dyeworks). Judy's Novelty Yarns had a nice Rambouillet fleece at a dirt-cheap price, and I replaced my nearly worn-out sock needles with some of the new Addi Rockets. My big "splurge" was on a couple of cherry Shaker-style boxes (a "presentation" box and a sewing box) made by a craftsman in Tennessee: they are works of art, and are proudly on display in the living room. All in all, Stitches was lots of fun this year, and I think it may become as regular a part of my time out of the studio as Black Sheep.

Tuesday, March 04, 2014

Doing...Or Writing About Doing

Has it really been four months since the last blog post?

The only explanation/excuse/reason I can offer is that I've been busy. Very, very busy. I've been doing a lot of weaving, running a business, establishing myself as a full-time artist, overseeing some remodeling work on the house (I finally have a downstairs bath, rather than a powder room), and, of course, the holidays fell in the midst of all this. I am happy to report that the holiday decorations did get taken down and put away before the end of January, and that the house is clean enough that I'm not embarrassed by it if people visit. Even the studio is moderately tidy!

This is the conundrum I'm currently pondering, along with listening to an audiobook and threading heddles on Mongo (my beloved Macomber loom): Do I spend my time doing [fill in the blank] or do I spend my time writing about it? I seem to be having trouble finding the balance point between those two poles. I can't, for the life of me, figure out how Eleanor Roosevelt managed to do it all: travel, lecture, teach, oversee New Deal programs, correspond with a wide group of people, attend meetings, be active in national and international politics, and write a nationally syndicated newspaper column six days a week. I don't think she slept between the end of WWI and her death in 1962. I can't work at that pace: I'm too inherently lazy, and I need to sleep on a regular basis.

On the other hand, if I put something on a regular schedule, it gets done. I've done this with the general housekeeping (Mondays), and the grocery shopping (first business day of the month), so it should work for regular blog posts. Sometimes, it may be nothing more than a pretty picture, because pretty pictures make the day nicer; at other times, it may be a regular blog post, complete with pictures. We'll just have to wait and see what I can come up with.


Friday, October 25, 2013

Hacks, Semi-Hacks, and Good Ideas

     I tinker with things. I can't help it--sometimes it's necessary to mess with something to make it more efficient, or to make something more useful. These have picked up the inelegant name of "hacks." The word "hack" originally meant to cut something into pieces. It began to be used as a noun in the 1980s by computer people to refer to a piece of computer code. Since that time, the word has been attached to nearly everything that people tinker with to make more useful.
A Finnvard trestle studio stand
     There's an entire group of hacks that center on what one can do with furniture from IKEA, the well-known Swedish home furnishing chain. IKEA furniture--especially the cheaper, flat-pack stuff favored by college students--is great for hacking: it's cheap, plain, and modular. In many ways, it's the ground beef of home furnishings, and can be turned into a lot of different things.
     A lot of what's in the studio started off at IKEA: my work table/desk is a Gerton tabletop with Adils legs and a hutch (no longer available); a Finnvard adjustable trestle serves as a stand for my hand bobbin winders, my umbrella swift, my combs, or my hackle, depending on what I'm doing; an umbrella stand makes really good storage for yard sticks, long stick shuttles, and my monopod; while a partially-opened Bjursta extendable table is just the right size and height to be a stand for my table loom. The studio stays organized because I have a large collection of small wooden drawer sets and rattan baskets, all from IKEA. It's safe to say that my studio decor is "early IKEA," mostly because I can turn basic furnishings into what I need.
     The latest IKEA hack is a reed stand and additional storage. A stand for loom reeds--especially long reeds--is essential, as they will bend if not stored without weight on them. They're also horribly expensive: a decent reed stand (without additional storage) ranges from $250 to $400. I needed a better, less expensive solution.
The IKEA Ivar reed stand
     I cannot take credit for this idea: the original hack was by a woman on Ravelry who posted a picture of what she did with some unwanted IKEA furniture that had belonged to her college-age offspring. I liked it, but thought I could take it a bit further by using the taller version of the same shelving. The result is a seven-foot tall, skinny set of shelves above a reed stand that fits behind the door of the studio. This IKEA hack took the following materials (total cost about $65):

--2 84" Ivar bookcase ends
--5 Ivar 19" shelves
--1 Optimator stablizer
--2 19" long 1x3" pieces of pine
--4 36"x3/8" wooden dowels
--4 1 5/8" wood screws

My reeds (and some sticks),
all properly stored
It was a pretty easy task to assemble the Ivar bookcase, leaving a 48" gap between the bottom shelf and the next shelf. Once the bookcase was assembled, the real work began. I took each of the 1x3s and marked where I needed the dowels to go. After marking, I drilled holes most of the way through the 1x3s for the dowels (I used a drill press to get the holes the right depth), then cut the dowels into 6" lengths with the cutoff saw. Once that was done, it was a simple matter to tap the dowels into place with a mallet. The 1x3s are attached to the uprights for the bookcase at 15" and 30" from the bottom with the wood screws. The entire project only took a couple hours, and I have a reed stand with shelves above for various cans of oil, lube, starch, and air, my warping tools, my combs, and (at the very top) stuff I rarely use. Behind the reed stand are my two tallest (56") reeds: I decided that this was a better way to store them, rather than make the reed stand taller and need a step ladder to reach the shelves.
     All in all, I'm pretty pleased with how my new reed stand & storage turned out: my reeds are safe, I have more storage space (which filled up quickly), and I had a good time working with a bunch of power tools.


Wednesday, October 23, 2013

East Bay Mini-Maker Faire

Our display table. Bea, Cookie, and me, getting
ready to start teaching.
     What do you get when you cross a science fair, a county fair, and a clean, G-rated version of Burning Man? You get Maker Faire. The brain-child of those crazy individuals at MAKE magazine, the first Maker Faire was held in the San Franciso Bay Area in 2006. Since that time, it's grown to 2 large Maker Faires (Bay Area and NYC), about 60 smaller, one-day "Mini Maker Faires," and a couple of international Maker Faires.
     Sunday, October 20 was the 4th East Bay Mini-Maker Faire (EBMMF), one of the oldest and largest of the one-day "minis." As Spindles and Flyers (one of my two spinning guilds) has been active in the Maker movement, and has done something at every EBMMF since the start, a small group of us showed up on Sunday morning to teach spinning on drop-spindles made out of dowels, cup hooks, rubber grommets, and used CDs. We worked hard, we taught a lot of people (around 200 people by my estimate), and we had fun.
     The Mini is a good warm-up for the big Maker Faire in May (May 17-18, 2014): I found we need a lot of space for teaching, and I'm toying with the idea of setting up a "restricted space" to demonstrate some fiber arts techniques that aren't as "kid friendly" as drop spindle spinning.

Step One: Getting the fiber ready to spin.
That's me, running the drum carder.

Step Two: Spinning. Lorah is demonstrating
how to draft to a young spinner.

Step Three: Plying. Jill is helping a young spinner
turn her spun yarn into a 2-ply yarn.


Tuesday, August 06, 2013

Dress Journal #10: Corsets & Crinolines 1


     The innermost layer is done, so it's time to move on to creating the shape necessary to support the visible layers. By this, I mean the all-important corset and the petticoat(s).

The Corset

     First things first: In my book, the corset is not to give one a tiny, Scarlett O'Hara waist. It is not the 19th century version of Spanx. Instead, it is the 19th century equivalent of a good long-line bra: it provides support for the bosom. It also helps to transfer the weight of petticoats, crinoline, bustle, and skirt(s) to the hips in a more comfortable fashion than having all those drawstrings and waistbands sitting right on top of unprotected hip bones. I don't believe in tight-lacing: if that's your thing, more power to you, but I need to be able to breath, drive a car, and actually move and work in a corset, so I need to be comfortable, while having the appropriate shape and posture. As I'm both very short-waisted (all my height is in my legs), and thick-waisted (primarily due to age), I need a corset that will support my bosom without digging into my legs when I sit, and allow the freedom of movement that a lot of 21st century tasks (like driving a car) require. When I wear a properly fitted corset, my measurements don't change, but my shape does.
     During the times that women wore corsets, many women wore light-weight corsets for more strenuous activities such sports. In that respect, the corset was rather like today's sports bra. Many of these "active" corsets were of lighter materials, and frequently stiffened with cord rather than steel to allow the torso more flexibility. Really stiff cord is hard to find: on the other hand, weed-wacker line is not, so that's what I"m using to stiffen this particular corset.
     I started with the corset pattern from Simplicity 9725, then made adjustments to the pattern to fit my torso without requiring a great deal of tight-lacing. I'm using a heavy cotton twill and, unlike the pattern, this will be made of two layers sewn together to create the channels for the weed-wacker line. This corset is white, so I can wear it under light-colored outer layers. I am also parting from a traditional 19th century corset by using hook-and-eye tape rather than the more popular "pop" front busk: I have a terrible time getting the busk fastened by myself, and would like to be able to dress myself.
     The construction is fairly straight-forward. I number each of the pieces to keep them in order, and fairly quickly have the two halves of the corset ready to be sewn together. Before I start sewing the layers together, though, I sew the edge binding onto the "fashion" (outside) layer, so once the weed-wacker line is in, I can turn the binding over and hand-stitch it down. Once that is done, it's the mindless sewing of channels for the weed-wacker line, following the seam lines to get the correct contours. After several hours and lots of thread, I have two very well-quilted halves of a corset. Time for stiffening.
     I'm using .080 weed-wacker cord, and it takes a lot: the better part of a 175' roll of the stuff. Fortunately, it's not expensive (less than $10) and can be cut with a pair of cheap scissors. It's also stiff enough I can thread it into each of the channels without any additional tools.
     The biggest part of corset-building is a lot of handsewing. Binding the top edge. Binding the bottom edge. Stitching down the lace beading. It's slow work, but it's now done, and with a couple of adjustments, the corset is finished.
     Over all, it took about 4 6- to 8-hour days to build and finish this corset. Now, I can move on to the crinoline.

Finished

  • Chemise
  • Drawers
  • Corded Petticoat
  • Corset


Monday, July 29, 2013

Dress Journal #9: New Clothes Mean New Underwear

     Historic spinning demonstrations have become a hot commodity. I have three this year: one was in April at Ardenwood Farm in Fremont, and there are two upcoming ones--in October and December--at Bale Grist Mill State Historic Park, north of St. Helena. These are all circa 1855 demos, in "costume," so I need something appropriate to wear.
     "Costume" can be pretty broad when it comes to local historic sites. Most historic sites (Sutter's Fort in Sacramento is a notable exception) let their volunteer docents wear whatever they can manage in the historic clothing area; as a result, it's usually a hodge-podge of long quilting calico skirts, long-sleeved blouses, and aprons. The docents mean well, but I have to work to a different standard. It's how I roll.
     Fortunately, I have a big fabric stash, I know my way around a sewing machine, and I have the time to build proper clothes for these historic spinning demos. I have about 9 weeks before the next demo, so I dug out some pretty sage-green print for a mid-1850s basque waist and skirt, to be worn over starched petticoats (no hoop skirt--not period). The same skirt, with a different basque waist, can be used for Dickens Fair in December, so I'm covering a lot of bases with a few multi-tasking pieces. But first, I need underpinnings: chemise, drawers, corset, petticoats, stockings.
     The first layer is chemise and drawers. I haven't built (to completion) mid-19th century garments for more than twenty years, so new chemises and drawers are essential: this is the layer that goes into the washer and dryer after every wearing, so once I'm sure the pattern works, I build multiple sets (rather like having a well-stocked lingerie drawer).
     Speaking of patterns, I use (and heavily modify) commercial patterns. I can--and would--work with a sloper and do the pattern design myself, but I lack an essential tool: a close-by pair of experienced hands to do fittings on my body. My dress dummy was last fitted in 1984, and over the years the "sands of time" have shifted to the point that her figure is not anything like my figure. Fortunately, the variety and quality of commercial patterns has improved greatly in the past thirty years, so a lot of the alterations are to get the fit exactly the way I want it.
Simplicity #9769--Drawers
     For the chemise and drawer patterns, I'm using two of Simplicity's "The Fashion Historian" patterns, #9769 for the drawers and #5726 for the chemise, as I want a chemise without puffed sleeves. Both of these are pretty decent: the drawers pattern only needs adjustment for my size and measurements. On the other hand, I don't care for the "modern" version of the chemise, complete with faux drawstring. The beaded trim along with edges of the "sleeves" will be eliminated, the buttons and buttonholes abandoned, and the beading along the neck will be functional.
     I'm in luck! At some point in the past couple of years, I started work on some mid-century clothes to wear to Dickens Fair, and already cut out and started to sew a set of drawers from this pattern. They just needed finishing, so a couple hours later, I had a set of drawers.
Simplicity #5726--Chemise
     The chemise needed to be started "from scratch." As I was digging around in the sewing room, I came upon fifteen yards of cotton batiste, so it went into the washing machine as I started to make the adjustments to the pattern. Once finished (and the batiste was dried and pressed), it was a simple matter to lay out the pattern, cut it out, and sew the chemise. In the process, I remembered why I hate flat-felled seams: either do them on the sewing machine and suffer scorched fingers as the raw edges are turned under and pressed, or do them by hand and take a lot longer. I'm glad to report that my scorched fingers are doing just fine.
     By the end of the day, I had a chemise and a set of drawers that only needed some minor handsewing (neckline, waistband, drawstrings). I also need a spool of lavender ribbon to thread through the beading on the chemise and drawers, but that will have to wait until Wednesday's trip to the fabric store.

Finished
  • Chemise
  • Drawers   

Sunday, July 28, 2013

Good-bye to Old Friends; Hello to New Friends

The Gilmore is gone. After 18 years of faithful service, including the occasional mishap (why I don't weave with a temple) and tangled warp, I've sold my big (46" weaving width) 4-harness/6-treadle floor loom, and we delivered it to a very nice young woman down in the South Bay.

The Gilmore, with the last warp--twill tablecloths.
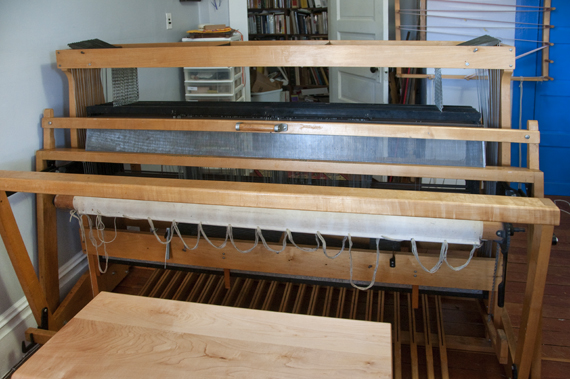
I found the Gilmore through a 3x5" card tacked to a bulletin board at Straw Into Gold, the Bay Area's legendary fiber arts store, in early 1995. It was being sold by a production weaver (she wove saddle blankets) who was "retiring" because her shoulders couldn't stand the stress of weaving with a heavy beater. She sold me nearly her entire studio--the loom, all the bits and pieces a weaver collects, nearly all of her tools, her small weaving library, and her entire stash (about 200 pounds of yarns)--and kept only her spinning wheel and her Gilmore Gem 8-shaft workshop loom. We carted everything home, lugged the Gilmore up the stairs (we put a gouge in the wainscoting that is still there in the process), and got it installed in what was then my studio (now my sewing room). I removed the ten pounds of lead weights attached to the beater, added more heddles, warped it, and quickly learned all the quirks and idiosyncrasies of a Gilmore jack loom.

A lot of yarn has been turned into cloth on the Gilmore. I've woven everything from the rug next to the bed (the first thing and last thing my feet touch every day is something I've woven) to scarves and shawls on it. The last project on the loom was a pair of cotton twill tablecloths that I finished in early June. 

It was a pang to let the Gilmore go, but it was time. I needed a larger, more complex loom that is more versatile. I also needed to move to a loom that I didn't have to fold up to dress--the Gilmore weighs close to 200 pounds, and closing up a 200-pound loom by myself was getting to be a little bit of a struggle. 

Exit, the Gilmore. Enter, the Macomber.

Mongo the Macomber--my 56" 16H/23T loom
I wasn't planning on getting a loom this big. I was looking for an 8-shaft workshop loom to replace my Baby Wolf, and had reduced my "short list" to two looms: a Gilmore Gem or a Macomber CP, better known as a "Baby Mac." Then, in May, I found the Macomber through Ravelry's Warped Weavers Marketplace. It was big (56" weaving width), it was complex (16 shafts), it was a good price, I wasn't going to have to lift and close a 200-pound loom, it was in...Southern California, about 450 miles south of me. No matter--I checked the measurements from Macoomber, measured the back of the pick-up truck, and closed the deal. It took three days to drive down to Southern California, load the loom, drive back up to the Bay Area, and roll the loom--on furniture dollies--into the garage, but we did it. I spent the next two weeks finishing off the tablecloth warp, rearranging the studio, moving the Gilmore down to the dining room (no scratches in the stairwell this time), then completely disassembling the Macomber so it would be small enough and light enough for two middle-aged people to lug it up the stairs to the studio.

It's said that to really know a piece of equipment, take it apart and successfully put it back together again. I feel like I really know this loom, as I've reassembled it from the ground up. Along the way, the Macomber picked up a nickname--Mongo--after Alex Karras' character in the Mel Brooks movie Blazing Saddles. Mongo is officially Macomber B4 #6636 (of the black name plate, Saugus MA series), built around 1968-1970, and sold to California State University Fullerton for their textile arts program. The university did not skimp on the "bells and whistles." Mongo has two plain warp beams--one with a friction brake and one with a ratchet brake--along with a warp separator bar, and plenty of room for four additional harnesses. As a school loom, he's suffered some indignities--including a warp being painted on the loom--but served well until the university eliminated the program in the early 2000s. I suspect he was used primarily as a rug loom: the warp painting debacle was with warps spaced 1/4-inch apart, and there were only about 50 heddles on each shaft. As I reassembled Mongo, I cleaned and burnished the metal parts with extra-fine steel wool, then gave them a coat of silicone, cleaned and waxed the wood, and added the extra treadles (now 23) and heddles (now 300 per shaft) to make Mongo a loom I can use.

I've now woven a couple of warps on Mongo, and I like my new friend a lot. There are still a few adjustments to be made: the weaving bench Bob Allen of Gilmore made for me a few years ago is a couple inches shorter than I really need to feel comfortable weaving, and I'd like to swap out the plain warp beam for a sectional warp beam as I really need to weave warps longer than my warping board. With these small adjustments, Mongo is a loom I will be weaving on for a very long time.


Saturday, July 27, 2013

Turning the Page

A big chapter of my life ended on June 30th. After 17 years of worrying about lesson plans, grades, keeping a classroom safe and productive, and all the other tasks that go along with being a full-time high school teacher, I have finally retired. It's a little earlier than I expected (I'm only 57), but it was time for me to move on to other things.

I have never been a "typical" teacher. I've tried to make room in my overly busy life for my friends, my hobbies, and my passions. I've never let teaching define a big part of who I am. As a result, retirement from teaching simply means I don't have to start worrying about lesson plans at the beginning of August, and getting up before the sun (and the students) once school starts in mid-August.

So, what am I doing to fill my "empty" hours? We will now pause for everyone to laugh hysterically. OK, enough of that. I started my own business as a fiber artist. Its name is Cal-Oro Fibrewerks. I have a tiny, tiny store on Etsy, a Facebook page, and I'm busy turning out handpainted fibers, handspun yarns, and handwoven textiles for people to love and (hopefully) buy. That's taking up a lot of my time, and I've never been happier.

In addition to the new business, I have a couple new "jobs." I'm now the president of the local historic preservation non-profit. I joined another fiber arts guild (Silverado Handweavers) and am serving as guild's liaison to the regional fiber arts organization.

I'm also doing some additional costuming, both for some historic spinning demonstrations, and for attending some Steampunk events. I think I even have time to start writing my blog again.

Basically, I'm busier than I've ever been, and a lot happier about it. Turning this page has been a very good thing.

Tuesday, July 23, 2013

Yarn Washing Day

Once again, I've accumulated a large quantity of yarns that need to be washed. A lot of it is handspun awaiting wet-finishing; the rest is millspun from an unraveled sweater, then quickly run through the indigo pot. No matter its origin, it all needs to be washed.

I like yarn washing during the summer. It's dry, and I can use my drying rack outside. It's also warm (it's forecast to be 82F today), so my yarn dries in a few hours. This is today's washing (before):


The green is about 1,100 yards of green multi-color merino top from Ashland Bay Trading Co. that's been spun into a nice tweed worsted-weight yarn. The little skein of wildly-colored yarn is a 2-ply sock weight superwash merino that I handpainted and spun at some point last year, but never got around to plying until this morning. The white is more of the Falklands 2-ply; again, I don't remember exactly when I spun it, but I plied it just this last week. Finally, there's all the wool/viscose/angora millspun worsted-weight that came from a sweater I unraveled in April. It used to be brighter, but a quick dip in the indigo pot calmed down the turquoise and knocked back the blinding white.

Washing (really, wet-finishing) is a fairly aggressive process. I use the technique recommended by Judith MacKenzie McCuin, which involves soap, boiling hot water, ice cold water, and a small sink plunger. If you want more information on how to wet-finish yarns in this fashion, check out Judith's article "Wet Finishes for Yarn" in the Summer, 2007 issue of Spin-Off magazine. I finish off the wet-finishing process by "thwacking" the skeins on the side of the claw-foot tub before hanging them out to dry on the drying rack: it straightens and settles the yarns into place, and is good for releasing any frustrations.

Once the yarns are hanging, I can forget about them. My drying rack is on the upstairs porch, on the north side of the house, so there's no direct sunlight that might fade the yarns. It's also up high enough that ground-based critters can't get up there, so the yarns are safe.

So, this is what it looks like when everything is dry again. How much yarn is hanging on the rack? I don't know exactly, but somewhere in the neighborhood of 3,000 yards, of which about 1,500 is handspun. It's a good couple of weeks of work.


Thursday, April 04, 2013

Wool Washing 101


I get asked "How do you wash wool?" a lot, especially during the summer when raw fleeces are most available. In the interests of time and my decided dislike for repeating myself ad nauseum, I'm putting a full set of directions here. First though, I'd like to thank Paula Shull, fiber artist extraordinaire, for teaching me the basics of washing wool--my method is based on her method, and it works.

To Wash Wool

1 raw fleece
Large flat work surface
7-10 yards nylon netting
Scissors
20-50 small rubber bands
2 24x36 mesh lingerie/laundry bags
1 top-loading washing machine
60 gallons very hot water (above 140 degrees)
1 stick or large wooden spoon
1 kitchen timer
1 cup Dawn dishwashing liquid
1/2 cup white vinegar

The key to easy washing is selecting good fleeces. The less dirt and vegetative matter (VM) in a fleece, the easier the fleece is going to clean up and prepare for spinning. Bargain fleeces can be cleaned up and made spinnable, but they require a lot of time and work; when the time and irritation is factored in, a $5/lb. fleece frequently costs more than a $10/lb. fleece.

Step 1: Skirting
Even award-winning, show-quality fleeces sometimes need a bit of skirting, and regular fleeces frequently need a bit more. Skirting removes the worst of the stuff that won't be used anyway, and keeps it away from the wool that will ultimately go through the combs or carder and be turned into yarn.

To skirt a fleece, simply roll it out on a very large, flat surface: I spread a big blue tarp on the driveway, then slide the fleece out of the bag and roll it out. Fleeces are usually rolled the same way--folded lengthwise with the freshly sheared side out, then rolled from head to tail and stuffed in a large plastic bag--so unrolling it should be pretty easy. Once the fleece is unrolled, pick out any obvious VM, and go around the edges of the fleece, pulling away the short bits and dung tags. As you work, pick up the fleece as best you can and give it a good shake to remove any loose second-cuts: if left in, those will end up as nepps.

Step 2: Washing
The water for wool washing must be hot and plentiful. Turn the setting on the hot water heater to the maximum and leave it for at least 8 hours before checking the temperature of the hot water coming out of the tap (if the hot water supply is shared with other members of a family, let them know the hot water is very hot; no one likes being scalded). If it's still under 140 degrees, plan on washing smaller quantities of fleece at a time on the stovetop, or contact a plumbing contractor about a new hot water heater.

Cut at least several pieces of nylon netting 24 inches x the width of the nylon netting (usually 72 inches) with the scissors.

Working along the raddle lines (the places where the locks naturally separate), break the fleece down into dinner-plate-sized pieces. Take a piece and set it in the middle of a spread-out piece of nylon netting, then gently wrap the nylon netting over the fleece. Continue wrapping until you have a large "sausage" of nylon netting stuffed with the piece of fleece. Put a rubber band at each end of the "sausage" to keep the nylon netting in place. Keep making "sausages" until the entire fleece is broken down and wrapped in nylon netting.

Fill each lingerie bag with one layer (about 6) sausages, then close each lingerie bag.

Fill the washer with hot water and turn off. Dissolve 1 cup of Dawn dishwashing liquid in the hot water, then add the lingerie bags of wool, pushing them beneath the surface with a stick or wooden spoon. Close the lid, set the timer for 40 minutes, and walk away.

At the end of 20 minutes, turn the washer setting knob to "Spin" to drain the washer and spin out the wash water. Do not use a Spin setting that adds water during the cycle. Remove the bags of wool and set them aside, then refill the washer with hot water and turn off. Add the bags of wool, push them beneath the surface, close the lid, and set the timer for another 20 minutes.

At the end of the second 20 minutes, turn the washer setting knob to "Spin" to drain the washer and spin out the water. Again, remove the bags of wool and set them aside while filling the washer. When the washer is filled, add the vinegar, stir, then add the bags of wool, pushing them beneath the surface. Close the lid and set the timer for 20 minutes.

Step 3: Drying
At the end of the third 20-minute period, drain and spin the washer and remove the bags of wool. Open the lingerie bags and remove the sausages. Open each of the sausages and carefully spread the wool to dry on a drying rack in an airy place, preferably out of direct sunlight. As the wool drys, feel the wool: does it feel clean? If not, roll the sausages back up and repeat the washing steps. I have found that medium-grease fleeces such as Romney and Corriedale just need one washing; high-grease fleeces such as Cormo and Rambouillet need two.

Step 4: Storing
Once the wool is completely dry, store it in a cool, dark place. I use 12-gallon plastic storage bins as I can simply stack the wool in the box with the nylon netting it was washed and dried in dividing the layers. This preserves the lock structure for combing.

Thursday, August 02, 2012

Teaching as Competitive Sport

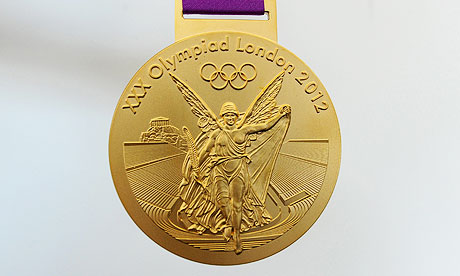
     Yay! The Summer Olympics are currently going on in London, and lots of happy athletes are taking home gold, silver, and bronze medals. I've spent far too much time in front of the TV or the computer, watching the coverage and knitting.
     Right on the heels of the Summer Games is the start of the school year. My first official day back is Thursday, August 16, but if I want to take advantage of the District's "Buy Back" days (basically, extra days of work for which I am paid somewhat less than my actual salary) I have to be at two day-long meetings beginning on Tuesday, August 14. The kids come back to school on Monday, August 20, and the long grind to next June begins again.
     The Olympics and the start of the school year got me thinking about the similarities between teachers and Olympic athletes. There are actually many similarities. Here's a list:

  1. Olympic athletes get up at ungodly hours to train. Teachers get up at ungodly hours to write lesson plans, prepare for the day, and grade papers.
  2. Olympic athletes give up a great many things--including personal lives--to focus on their sport. Teachers give up a great many things--including personal lives--to focus on their jobs.
  3. Olympic athletes do not make a great deal of money (unless they get lucrative endorsement contracts). Teachers do not make a great deal of money (unless they get lucrative administrative consultant contracts).
  4. Olympic athletes are scrutinized and scored on every little nuance of their performance on the playing field. Teachers are scrutinized and scored on every little nuance of their performance in the classroom.
  5. Olympic athletes spend many years and thousands of hours perfecting their sport. Teachers spend many years and thousands of hours perfecting their teaching.
  6. The best Olympic athletes learn to adapt quickly to changing circumstances (e.g., Michael Phelps' goggles breaking during the 2008 200 Butterfly Final) to minimize disrupting their performance. The best teachers learn to adapt quickly to changing circumstances (e.g., moving a classroom with 24 hours notice) to minimize disrupting the learning environment.
  7. Many Olympic athletes have a "kick": an extra bit of speed for the end of a race. Many teachers have a "kick": they use it to finish covering content in the two weeks between the end of Spring Break and the start of state-mandated testing.
  8. Olympic athletes make the difficult/impossible (e.g., a 2 1/2 inward with 2 1/2 twists off the 10-meter platform) look easy. Teachers make the difficult/impossible (e.g., Calculus) look easy.
  9. Armchair athletes around the world see an Olympic athlete perform and think, "Heck, I could do that." They can't, but they think they can. State legislators and the public see a teacher teaching and think, "Heck, I could do that." They can't, but they think they can.

Thursday, July 26, 2012

Games: Olympic, Knitting, and Rules for Both

     Tick, tick, tick...in less than 24 hours, the 2012 Summer Olympics will officially start in London, England. The Games have already started, as Women's Soccer kicked off yesterday with 6 matches (and the US Women's Soccer Team won their match against France, 4-2), but the Opening Ceremonies are Friday evening and the first medals will be awarded on Saturday.
     Also starting in less than 24 hours are the 2012 Ravellenic Games. After the USOC got their collective panties in a bunch over a bunch of (primarily) women calling a good-natured online excuse to spend many hours knitting, crocheting, or spinning while watching the Olympics coverage on TV the "Ravelympics" the name had to be changed. They were the Ravelympics in 2008, when 5,600+ people completed more than 16,000 needlework projects. They were the Ravelympics in 2010 when, during the 2010 Winter Olympics, 4,151 people knitted and crocheted through all that ice dancing and curling competitions. But this time, the USOC pitched a fit and threatened the nice young couple that created and run Ravelry with lawsuits because we knitters and crocheters were, in some way, denigrating the efforts of our athletes, and hadn't coughed up millions of dollars to use their copyrighted words and images. After much hand-wringing and (I suspect) some tears, the name was changed to the Ravellenic Games, the rings left by tea and coffee mugs replaced the Olympic rings, and even the Union Jack is "not quite" the right colors, just to keep the London Olympic Committee (LOC) happy.
     I am ambivalent about this year's "competition." Some of it stems from the wrangling over the Olympics itself, from the silly and stupid rules the LOC has put into place to the controversy over the US Team's uniforms (designed by USOC sponsor Ralph Lauren) being manufactured in China. More of it seems to rise from the moderation of the group that serves as the clearinghouse for all online discussions of the Ravellenic Games. I realize that when the number of participants in an event--even an online "event" such as the Ravellenic Games--grows, there need to be more structure. However, there is no reason to be heavy-handed. There is no monetary, or even tangible prizes awarded in this event: at the most, one can download a cute little jpeg file to add as a picture on a project. But the Rule of Inverse Importance ("The less important something is in the real world, the more important it is to people that have little or no control over their real world lives.") runs wild on a project such as this, and people have actually been threatened with "disqualification" if they break one of "the rules." Disqualification? Really? Is someone going to knock on my front door and then tell me I can't knit a tea cozy or crochet an afghan during the Olympics? It's all rather silly, and as a result I have stayed in the background.
     In spite of my ambivalence, I am planning on some nice projects for the Ravellenic Games. Once again, I am a member of Team TARDIS, made up of mostly Doctor Who fans. This year, we have a good-natured competition with Team SHERlocked (made up of mostly Sherlock fans) to see which team can produce the most British-themed items during the Games. To that end, these are my projects:

  • ACE Scarf. Event: Frogging Trampoline. Basically, I'm frogging this project because the yarn isn't suitable for the design.
  • Ishbel Scarf. Event: Frogging Trampoline. Frogging another scarf out of some wonderful handpainted superwash merino/cashmere because I completely screwed up the lace.
  • Fourth Doctor Scarf. Events: WIP Wrestling & British Cricket. Finishing is the bane of my existence. This has been nearly finished for more than a year, so I'll weave in the ends, add the fringe, and call it "done."
  • Purple Tea Cozy of Sex. Events: Home Stuff Hammerthrow, Cable Steeplechase, British Cricket. As part of a challenge from Team SHERlocked, I'm making a darling cardigan tea cozy that was inspired by the purple shirt worn by Benedict Cumberpatch in the series Sherlock. I have some nice hand-dyed purple yarn just for this.
  • Much Bigger on the Inside. Events: Lace Longjump, Shawl Sailing, British Cricket. The online knitting magazine Knitty ran a wonderful pattern for a TARDIS-inspired shawl out of sock yarn earlier this year. I didn't have the requisite sock yarn, but I had a couple skeins of Lion Fisherman Wool left from a sweater, so into the dyepot it went, and I have more than enough to knit a large-scale version.
The yarns are in cakes, my needles are ready, and I've laid in a supply of snacks for the next several weeks of marathon knitting and TV. I guess I'm ready to start!

Saturday, July 07, 2012

Awards Season

     Every year, from early May through late October, states, counties, and agricultural districts hold their annual fairs. The County Fair has been a time-honored summer tradition in America for more than 200 years: in 1811, Elkanah Watson of Pittsfield, Massachusetts organized the Berkshire County Fair, "...featuring a procession of 'three or four thousand animals,' a band, displays of local industries, and artisans. Watson also took careful steps to attract women by offering premiums on domestic products and by holding an annual ball." (from the Iowa State University Center for Agricultural History and Rural Studies American Agricultural History Primer) Two hundred years later, millions of Americans flock to their county and state fairs to look at the livestock, examine the quilts, check out jars of jams and pickles, bet on horse races, eat foods they never would consider consuming at home (deep-fried Oreos? Really?), and see performing acts from racing piglets and demolition derbies to major rock and country-western stars. It's summer, it's hot, and it's time for the Fair.
     Fair time is "Awards Season" for those of us who compete at local, county, and state levels. I've always been mildly obsessed by the competitions in the Domestic Arts arena (Preserved Foods; Baked Goods; Clothing & Textiles). There are people who will give me ribbons, rosettes, and cash for what I enjoy doing anyway? Sign me up! I've competed in a number of Fairs in the past 25 years, and I have a lot of awards to show for my efforts. In the kitchen is a big wrought-iron hook for hanging bills--there are more than a hundred ribbons (mostly blue) hanging off that hook. Ribbons from Los Angeles, Ventura, Solano, and Yolo county fairs; ribbons from the Dixon May Fair, a local ag district fair; and ribbons from the California State Fair. Along with the ribbons are shadow boxes full of the coveted Best of Show and Sweepstakes awards, given for the best jam, or the best jelly, or winning the most Blue Ribbons in a single fair.
     I stopped entering in the Preserved Foods and Baked Goods competitions about seven years ago, primarily because I wanted to spend my summers doing something other than making fifteen kinds of jams and jellies, or baking six different kinds of bread in one day. I decided to start focusing on the Clothing and Textiles competitions, specifically those for handspun yarns, needlework (especially crocheting and knitting), and handweaving. I had entered a little bit in the 1990s, and done "OK," but now it was time to get serious. I began entering skeins, afghans, socks, scarves, shawls, and some of my handwovens, and slowly the ribbons hook in the studio began to fill up with ribbons (mostly blue).
Ribbons from the Dixon May Fair
     This year has been a turning point. It began in May, at the Dixon May Fair, when a simple scarf woven from handpainted sock yarn took a blue ribbon for Handwoven Items and Best of Division (the May Fair does not award "Best of Show") for the Handspun/Handwoven items. I did well, but Dixon is a small ag district fair.
A mess of winners from the Marin County Fair
     Then came the Marin County Fair. I dropped off my entries in early June--some of the same items I had entered at Dixon, along with some others--missed attending the Fair completely, and didn't find out how I did until Thursday. When the woman in charge of releasing exhibits took my claim checks said, "Oh, that's your stuff," I started hyperventilating. I had good reason: along with my pile of entries (there were eight), was a pile of blue ribbons, two Special Award rosettes, and two big Best of Show rosettes. I had won nearly everything! The comments, written on the back of the entry cards, were full of compliments on my color design, my spinning, and my workmanship. I was shocked. I'm still shocked. The handpainted silk sliver I had spun and plied and despaired of winning anything won Best of Show--Handdyed Skein. The wet-spun flax singles I spun one afternoon garnered the Best of Show--Single Fiber and a Special Award from Marin Golden Threads. My lace shawl knit early this year from BFL I had spun and handpainted last year won the Bluebird Yarns Special Award (and a $50 gift certificate!). I did very, very well.
     Now I'm getting ready for the next competition: the Solano County Fair. It's a smaller fair than Marin, but is my local county fair, and the fairgrounds are minutes from home. I enter the Solano County Fair because I will go to this fair to look at the livestock, examine the quilts, check out jars of jams and pickles, eat foods I never would consider consuming at home (Corndogs! Funnel cakes!), and see how my entries fared.

Monday, July 02, 2012

Spin Journal #16:
My Little Puni

     While I was at Black Sheep, Heidi (my fiber friend and frequent partner in crime) showed me a cool trick to create the raw material for unsual variegated yarns. She had attended something called "Spindle Camp" the previous week and, while there, had seen someone take bits of different colored tops, place them in thin layers, then use a puni stick--usually used in preparing cotton for spinning--to turn them into "wool punis"--basically, rolags without the hassle of dealing with handcards. Pretty cool, and a great way to sample, I thought.
     I purchased a couple of Fantasy Fiber's "Mystery Batts" so I could have something to spin (the stuff I had brought up from the stash turned out to be that nastiest of all breeds, Crappydale). Fantasy Fiber produces these weird and wonderful batts from a mixture of fibers: mostly merino, with alpaca, mohair, angora, ramie, silk (both tussah and bombyx), silk noils, rayon, llama, and firestar/flash. Different colors are layered onto one of their big drum carders, and they sell the batts dirt-cheap (less than $1.40 an ounce), so they're a great bargain if one can find something that's a blend of desirable colors. I dug in their Bargain Bins until I found two pretty similar batts and carted them away. I don't like spinning from a long strip torn from a batt, so I pulled each strip into smaller bits, then used Heidi's trick to turn them into punis to spin. I liked what I got--a rapid change in color/texture that had the capability of becoming a tweedy yarn when plied. I managed to get one bobbin filled before I came home from Black Sheep.
     Fast forward to the Tour de Fleece. I finished spinning and plying the Llanwenog on Saturday morning, and wanted to spin long-draw as a break from the "precise" spinning of short-draw, so I pulled out the rest of the Mystery Batts and got back to work on them. I weighed everything out so I would have a pretty even distribution between bobbins, then started turning the rest of the batts into punis. Lots of punis. That done, I put on my headphones, started listening to a trashy romance novel, and began spinning.
     Sunday morning dawned and I went back to work on spinning up all those punis. My long-draw spinning isn't quite as fast as it once was, primarily because I've learned better control over the fibers. In the past two years, I've gone from spinning a heavy woolen single that plies up to a bulky 2-ply to spinning a fairly fine single that plies up to a nice sport-weight 2-ply. I'm getting a lot more yarn to the ounce, but it takes longer to spin that ounce. I finished the trashy novel, downloaded another, and kept spinning. When finished, I had four bobbins--2 full, 2 nearly full--to start plying.
     I got the first bobbin full of plying finished and wound it off in time for Sunday's midnight deadline to post pictures of my new yarn. I think it's decent--a yarn that looks like a heathery blue-gray from a distance, but reveals its rainbow of colors on closer inspection. At this point, it still needs wet-finishing (which may change/lighten the color slightly), but first I need to finish plying all those singles.