Tuesday, November 19, 2019

WWJD: What Would Jim (Ahrens) Do?

    Once upon a time, about 80 years ago, a guy named Jim Ahrens took up weaving as a hobby. Ahrens was someone who liked to work with his hands--he was a cabinet maker--and had those wonderfully wild engineering skills that allow some people to not only look at a problem and ask, "Why is this happening?" but then sit down and come up with an elegant solution. With a background in mechanical engineering and machine design, it's not surprising that weaving appealed to him: the process is a delightful blend of art and engineering, and you get to play with some pretty interesting machinery and tools.
    I don't know the entire history--Jim Ahrens passed on nearly 20 years ago--but I suspect that he, like many weavers, was mostly self-taught. That has some disadvantages--the learning curve can be steep--but one of the big advantages is that you aren't hamstrung by traditions. You can look at a problem, or a piece of cloth, and engineer/reverse-engineer a solution. For example, it's a pain to climb under a loom to change the tie-up, and the bigger the loom, and the more complex the draft, the more work it is to change the tie-up. Ahrens looked at the design of looms and thought, why not move the tie-up system to the side of the loom, so you can simply change the tie-up while standing (or sitting) next to the loom. Ahrens Looms are known for their patented side tie-up systems.
    Ahrens also studied how looms and weavers interacted in earlier times. Master weavers turned out miles of complex cloths, but many of their secrets disappeared as handweaving was mechanized during the Industrial Revolution. By the start of World War Two, handweaving looms were limited to four or eight shafts and, in the United States, usually either counterbalance or jack looms. (Bexel was making their "Cranbrook" countermarche rug loom, but they were very rare.) As the story goes, Ahren's wife Dorothy brought home a beautiful piece of linen she wanted replicate, and once they determined that it took 36 shafts to recreate the pattern, Ahrens added 4 additional shafts for the selvedges, then built his first mechanical dobby handweaving loom. That first dobby led to others; and a partnership with Jon Violette to form AVL Looms in the 1970s; and on down to Bertie.The "A" in AVL, and in A-Series is for Ahrens.
The Ahrens Dobby, at the start of restoration.
(Picture from Peggy Osterkamp's Weaving
Blog, August 16, 2019)
    Jim Ahrens' big 40-shaft dobby is owned by weaver/ teacher/author Peggy Osterkamp, and has just been restored to working order by Peggy and her apprentice (and talented weaver in her own right) Vera Totos. The loom is a beast: the 40 shafts controlled by the dobby head are fronted by an additional 4 counterbalanced shafts that weave the ground cloth, making it possibly the only mechanical (no electricity required) 44-shaft loom in the world. However, the familial relationship between that old loom and Bertie are quite evident: Bertie doesn't have 4 counterbalance shafts full of flat steel heddles, and the Ahrens Dobby doesn't have a computerized dobby head, but both work on the same general principles.
    So, if the two looms are similar, how does that affect setting up the heddles on Bertie? I looked at the photographs Peggy and Vera posted, and created a spreadsheet of shaft and heddle usage on the last dozen projects, including every one woven on Bertie. What I found:
  • I like to weave designs on a plainweave background
  • I weave a lot of tied-weaves, from Huck Lace to Summer-and-Winter to Batemans
That means I tend to put a lot of ends on a few shafts, while the rest are spread out to make the design. Those shafts should probably be in front, rather like the ground shafts on the Ahrens Dobby. I like my selvedges on separate shafts from the rest of the warp, but I don't want the shed geometry to be considerably different from the shed geometry of the ground, so the selvedge shafts should also be at the front. That leaves the rest of the shafts--30 to 36--free for design purposes.

For a lot more information on Jim Ahrens and his looms, check out Peggy Osterkamp's Weaving Blog and the Ahrens Looms website.


Sunday, November 17, 2019

OMG, She's "Crafting!"

    It's one of "those" days. You know--the ones where the world seems a bit off-kilter from the moment your feet hit the floor. I knew it when I peeked at my Facebook news feed and found that the very first item was an argument in an historical sewing group over...the costumes worn by a bunch of dancers. In a 1966 Andy Williams Christmas special. Shot on a soundstage in Hollywood. No, I don't make this stuff up. Needless to say, my eyes rolled nearly to the back of my head. Really? I mean, REALLY??
Kimberly Hammond's
Christmas Tree Hat
    For a change, I decided to roll with the world being a wee bit tipsy, just for fun. This nonsense reminded me that I saw a terrific novelty hat in the shape of a Christmas tree on someone recently, so I perused Ravelry's pattern database for something similar to that hat. My only requirements: the pattern is free; it's crochet; and it has popcorn stitches to simulate the tree branch tips. It only took a few minutes to find what I was looking for: Kimberly Hammond's "Christmas Tree Hat" pattern. I'll need to make a few changes, as I want it to be a bit wider and squatter, but the pattern--which Ms. Hammond has generously made available to the world--will give me a starting point. While I was on Ravelry, I also pulled some patterns for a Santa's elf hat, complete with ears. If I'm going to run around this holiday season with a Christmas tree on my head, then the long-suffering Spousal Unit can be one of Santa's elves.
My work table is being taken
over by Christmas.
    I normally do not keep holiday "crafting" supplies on hand--everything I have in red, green, and white is very small, cotton, and earmarked for weaving holiday towels for "the shop." A trip to Michael's was definitely in order. It's fairly late in the season to start on holiday "crafts" (Michael's starts putting the holiday stuff out just after July 4th), so the shelves were somewhat bare, but I managed to find green, red, and white acrylic yarns (on sale), tiny plastic Christmas ornaments to trim my "tree" (on sale), and since there's no success without excess, a long string of battery-operated multi-colored LED lights (on sale).
    So I'm probably committing terribly inappropriate pre-Thanksgiving holiday crafting. It somehow seems appropriate.

No glitter was used in the writing of this post. 

Friday, November 15, 2019

Heddles to the Right of Me, Heddles to the Left of Me...

    I'm doing that most dreaded of chores: moving heddles on Bertie.
    I am lazy. Laziness isn't a bad thing: I'm organized because I want to be as efficient as possible with my time and energy. Laziness also means that I want to spend my time and energy on things I like (throwing a shuttle), so things that aren't that are on a list that ranges from "dislike" to "absolutely hate." Things I dislike (but do) include warping and threading heddles--they're chores, but necessary for the reward of throwing a shuttle.
    At the top (or bottom) of the list is moving heddles. It doesn't matter what kind of heddles they are--flat steel; wire; inserted eye; or Texsolv--counting them out, bundling them up, then moving them is, in my opinion, a complete pain in the ass and something to be avoided whenever possible. I avoid moving heddles very often by being organized: I make sure there are enough heddles on each shaft to avoid running out, and I mark the center heddle on each shaft so I can balance the number of unused heddles on each side of each shaft.
     I will also state here and now that I loathe Texsolv heddles. (For those unfamiliar, Texsolv polyester heddles were invented to replace the string heddles used on a lot of Swedish looms.) I like metal heddles, especially inserted-eye heddles: they kind to the warp, easily slide on the heddle bars (especially when the bars are waxed), and it's easy to use a threading hook to flick them into position for threading. Texsolv does none of those things: they can abrade a delicate warp; they don't easily slide on the wood heddle sticks; and they're so floppy the only way they are easily threaded is one at a time with my fingers. Their only saving grace is that they're light as feathers, so the don't interfere with the shedding action on Bertie.
    When I got Bertie, I knew it was going to be difficult to determine an individual warp end having a problem with its assigned heddle, so I made the decision to "color code" the shafts. This is pretty common among weavers with many, many shaft looms, and solutions range from coloring individual heddles with Sharpie markers to painting them with diluted acrylic or fabric paints to dyeing them. Each has its drawbacks: Sharpie markers fade; acrylic and fabric paints flake when they get old; polyester requires special dyes. I knew where to get polyester dyes, so I ordered three colors of dye--purple; green; gold--and proceeded to sort and dye about 75% of Bertie's 4,000 heddles. The heddles dyed beautifully, and I got them resorted, bundled, and onto the shafts so I could do a decent amount of weaving last year.
    Fast-forward to 2019, and I am dealing with a warp that was becoming a "dog." Dog warps happen when something is seriously wrong with the design, the warp, or the loom, and they're awful--you don't want to weave off the warp because it's so much work, but you don't want to take the scissors to it. In this case, the dog is nearly 30 yards of white 8/2 cotton for weaving towels (484 ends), so I can't afford to scrap that much yarn, but I keep getting tiny random floats that ruin the cloth. I finally found the problem--the heddles shrank when I dyed them, leaving the undyed white heddles 7/16"/1.12cm longer than the dyed heddles. They're "sloppy," and get tangled around the adjacent shafts, causing the floats, then untangle when the adjacent shafts are raised. These random floats don't show up on broken twills and warps with matching wefts; on the other hand, they're really noticeable on my "bread and butter" towel warps. These are warps where I weave the same design in eight different colors, so the warp is a single color, but each towel is a different weft color. The designs also feature a lot of plainweave, so any imperfection stands out against that plain background.
    There's only one solution for this problem: treat the undyed heddles to the same conditions that caused the shrinkage in the dyed heddles. In other words, take all the undyed heddles off the loom, throw them in a pot with water (and a little Synthrapol), and simmer/boil them for 30-45 minutes. I tested my theory, then got to work fixing this problem. Since I have to take the heddles off the loom, this is an opportunity to thoroughly clean and oil the loom, update the Lenovo Yoga Laptop/Tablet that I use to run the dobby head, and reorganize the heddles to better take advantage of the shafts. Meanwhile, the warp--with the threading cross on a pair of lease sticks--is resting at the back of the loom until I'm ready to thread heddles again.

Thursday, November 14, 2019

The Other Man: Bertie

Bertie, my AVL A-Series loom.
    There is another man in my life. He came into my life a little over a year ago, but our relationship is still in that tentative, "getting to know you" phase.
    Before anyone has a major freak-out, Bertie is a loom. A really big floor loom.
    About eighteen months ago, I realized I needed to replace Mongo, my much-loved 16-shaft Macomber loom. Mongo is a terrific loom, and I cranked out a lot of fabric on "him" (I anthropomorphize my big looms). However, Mongo is also completely mechanical. My Achilles tendons are mostly shot, and a lot of the joints in my ankles and feet look like pin cushions from osteoarthritis (I grow bone spurs), so treadling was really becoming a problem. I also wanted a dobby loom that could handle more complex drafts. I called AVL Looms in Chico (California), made an appointment, and went up there to "test drive" looms. I knew what I wanted: a 40-inch weaving width; computerized dobby head; assisted shaft-lifting; and 40 shafts. That describes an AVL-V-series loom to a "T," and that was what I was expecting to order.
    I spent nearly two hours talking to Bob Kruger, and trying out everything available that met my basic requirements. I couldn't try a V-Series, as the only one on the floor had just been picked up, but I tried the prototype K-Series and an A-Series that was on the floor. The K-Series was neat, but I didn't like the geometry and the Spousal Unit was concerned about it being new technology. However, the A-Series was a good fit, an established, proven design, and flexible enough to be modified to exactly what I wanted: 40-inch weaving width, 40 shafts, e-lift, two warp beams (one 1-yard; the other 1/2-yard; automated cloth advance. While I was at it, I also ordered a new tension box and the mounting track for it. I put down the deposit, then went home and sold Mongo.
    The new loom was ready in mid-August, and we went back up to Chico with the truck and picked up the loom. One of the nice things about AVL looms is that they are "flat-packed": the back of the truck was filled with fifteen boxes (the dobby head, in its box, went into the truck cab), and after we got it home, it was pretty easy to unload the boxes into the garage, then bring the loom up to the studio in small pieces. The very first box had the instructions for assembly: a 3-ring binder of about 200 pages of photos and directions. It took a while, but just like IKEA furniture, the loom went together with simple hand tools.
    A brand-new loom is not cheap, especially a big loom with a lot of bells and whistles. However, the "nearly perfect" loom is rather like a custom kitchen to a cook: you can live without it, but life is a lot easier with it. Bertie and I are still learning to work together to produce beautiful cloth, but we're making progress.
 

Monday, November 11, 2019

Taking Time Off

    I am officially taking 2019 "off." This isn't "I'm taking time off and doing other things," but "I'm taking time off from chasing the Almighty Buck."
    As a very small retail business, about 80% of my sales happen between Veterans Day (November 11) and Christmas. It's a lot of work: I need to make sure I have enough inventory, then it's three days of Open Studios, six subsequent Saturdays at Moschetti Coffee Company's Saturday Artisan's Market, and at least one Sunday art festival. Altogether, it's about 80 hours of packing, loading the car, unloading the car, setting up, tearing down, and (most importantly) selling, crammed into Fridays, Saturdays, and the occasional Sunday, with the remainder of each week spent producing more inventory, and getting ready for the holidays.
    In normal years, I start producing inventory early in the year so I have a good amount on hand by early November. Unfortunately, 2019 has not been "normal": I was away from the studio for much of the first half of 2019, and when I finally got back, the past two years finally caught up with me. I  simply couldn't find it within me to pick up a shuttle, or dye a skein. Meanwhile, the deadlines for different holiday events crept closer and closer. I worried over them, but I wasn't motivated to do anything.
    The turning point finally came in early October, when I formally gave myself permission to take the year off. I let everyone connected with different events know that I wouldn't be participating in 2019, and planned to do other things. We traveled a bit; I designed some new costumes; I put up a lot of preserves; and waited for my "mojo" to come back.
    It is coming back, albeit slowly. I dyed a bunch of skeins at the end of October; I planted flax and will be planting madder this week. I finished troubleshooting a couple problems on the current warp so it's ready to weave off. For the first time since 2015, I went to other people's studios and galleries this weekend for Open Studios. I had a good time, bought some original artwork (a piece of stained glass for the studio from a local artist), and scored a couple more tools from a fellow fiber artist. And I acknowledged that, even when I'm not actively producing cloth, I'm still focused on the artistic process. That warp will get woven off, and the next warp will go onto the loom and get woven off, and so on, but it will be for 2020.

NEWS FLASH!: The flax is up. 😀

Wednesday, November 06, 2019

Breakfast with Karl

The view from the upstairs porch.
Don't worry: it will burn off by 11 a.m.
    Karl is finally back, after being absent for nearly three weeks. We don't see a lot of Karl at this time of year, so waking up to gray skies and higher humidity was a lovely surprise. Karl is the fog.
    The Bay Area gets a lot of fog, primarily due to our geography and physics. Put a large pool of cold water (the Pacific Ocean) next to a warm surface (California), then gently blow air across the top of the water and the water vapor will condense to the point it can be seen. The fog starts to form off the California coast in the afternoon, streams in through the Golden Gate around sunset, and by the following morning, the Bay is shrouded in gray, tourists are shivering, and everyone is dressed in layers that are shed as the fog burns off. Everybody talks about the fog: "May Gray," "June Gloom," "Fogust," "fog days of summer," and even "fogpocalypse" are names given to the weather conditions. We're miles away from the Pacific Ocean, but blocks from another large pool of cold water (San Francisco Bay), so Karl usually joins us for breakfast.
    Why "Karl"? The 2003 movie Big Fish and Twitter.
    According to local news sources, in August 2010, a parody account named "@KarltheFog" popped up on Twitter, and began posting humorous comments about the fog and low clouds and the effect on planned events. (We complain about the fog, but don't let it get in the way of doing things.) The name "Karl" came from a character in the film: a giant who was terrorizing a town until someone realized that he was simply hungry and lonely. The creator of the account felt the fog was, like Karl, misunderstood, and set up the account with the comment, "All that is sunny does not glitter, not all those in the fog are lost."
    Anthropomorphizing the local weather condition changed attitudes toward it. The @KarltheFog Twitter account has, as of this date, 365,000 followers, and more than 20,000 likes. Karl has been a Jeopardy clue, and appears in a popular TV commercial promoting the beauty of California. San Francisco even has a "Fog Appreciation Day" food truck gathering to kick off "Fogust." And locals have gone from complaining to simply shrugging it off--when shivering tourists ask if summer is always so cold and gray, locals simply answer, "Oh, that's just Karl," before pointing them to the closest shop for a fleece hoodie embroidered with the Golden Gate Bridge.

Monday, November 04, 2019

Flax Farming

    One of the slightly odd things about coastal California is that we have two, nearly similar, growing seasons. One is the traditional growing season, when seeds or plants go into the ground in the spring, grow through the summer, and are harvested in the fall. Our days are warm, our nights are (mostly) cool, and if there's enough water, the harvest is good.
    But coastal California has a second growing season. This one starts in October or November, when the days are still warm, and the nights aren't quite below freezing. It ends in mid- to late April, just about the time it's warm enough to plant tomatoes. This growing season features cooler days, and colder nights, and...rain. Get the seeds into the ground early enough, keep them moist enough to germinate, and then--in most years--Mother Nature can take over the irrigation schedule.
    I went to a couple presentations on growing flax given by Chico Flax last month. Flax is a near-perfect winter crop for California: plant it in the fall, give it a little water to start, then simply let it grow. Flax loves cool weather, doesn't mind freezing nights, and is ready for harvesting about the time everything is warming up in spring. I've wanted to try growing my own flax, so I bought some Linum usitatissimum 'Suzanne' seeds with the goal of producing a tiny crop of my own.
    Yesterday was flax planting day. The garden itself is rather a mess: I've been away the past couple of years during the prime periods for working in the garden, so very little beyond the perennial bed in front of the house has been cared for, and my herb garden is mostly dead. However, this time of year is perfect for garden clean-up, transplanting, and generally reorganizing the garden. There are two tiny raised beds at the foot of the back garden: those beds are the only places that gets full sun all day (a requirement for flax), and won't be planted with vegetables until the spring, so the flax goes there. The soil is "ok"--the beds have lain fallow for two years, and have never been exposed to any chemicals--so there wasn't a lot of prep work needed, other than a good soaking to moisten the soil. Once moist, I simply dragged my fingers through the soil to create some shallow furrows, then broadcast the seeds over everything. After evening out the soil to cover the seeds, I pressed the soil down a little bit to make sure the seeds were in contact with it, then gave everything a good misting. According to Chico Flax, the seeds should germinate within 7-10 days. 
    Now, about that madder bed...

Saturday, November 02, 2019

Dress Journal #13: I Need a Sweater

We're off to the rink in our
brothers' sweaters!
     At the top of the list of things I need is a warm, lightweight, period-appropriate sweater, so this project is the perfect opportunity to knit an Edwardian turtleneck. (I'll pause here for the delicate flowers to clutch their pearls and reach for the smelling salts.) That right: I said "turtleneck sweater." As soon as those intrepid co-eds discovered their brothers' and fathers' athletic "jerseys," they began pinching them, then knitting their own. Why the surprise? Sweaters were as useful for outdoor activities at the beginning of the 20th century as they are at the beginning of the 21st century. There are plenty of photos of young women, often with skates slung jauntily over their shoulders, wearing turtleneck sweaters. There's even a bit of film shot by the Edison Studios of women frolicking in the snow, and many of them are wearing sweaters and dashing caps.
"Ladies' Outing Sweater" from The
Columbia Book on the Use of Yarns
(1904). I like the ribbing, but the
pigeon-breast is all wrong.
     Digging around in old knitting books uncovered some patterns for different "ladies' sweaters," but none are exactly what I want: I want a sweater like the girls are wearing. That means some creative extrapolating and adjusting patterns. From The Columbia Book on the Use of Yarns (1904), it appears that both ladies' and mens' sweaters were knitted "up the back and down the front," leaving no shoulder seams. The "Ladies' Outing Sweater" has a nice rib pattern--that will make the sweater fit smoothly. The "Mens' Sweater" has the ribbed lower sleeve detail that is evident in many of the photographs. A bit of this, a bit of that, and I have my pattern.
"Mens' Sweater" from The Columbia
Book on the Use of Yarns (1904).
I'll just "borrow" the neck and 
sleeve cuffs from this.
     Since none of these patterns were designed with my somewhat larger measurements in mind, I'll need to scale the pattern up to accommodate. I love Ida Riley Duncan's The Complete Book of Progressive Knitting for doing this. Duncan's system works off measurements taken from the wearer's body, and knitted swatches for gauge, and includes how to add the appropriate amount of ease to make the pattern fit appropriately. I've used it before, so this will make knitting this sweater simple.
     I want this sweater to be more than just a "costume" piece, so it needs to be light, warm, and not scratchy. Light means it needs to be thin, so a fingering-weight yarn on US#2/2.75mm needles should give me the thickness I want. The yarn can't be scratchy, so I'm using merino. And because I want this sweater to have some durability and not pill, there needs to be some nylon in the mix. (Some nylon in the blend also means the sweater can be gently machine-washed.) The yarn I've settled on is Knit Picks "Stroll" in the "Bare" colorway. I've used "Stroll" before, and it makes lovely socks. Knit Picks puts it up in 100g skeins for dyeing, but I'll simply skip the dyeing and knit an ecru sweater.
     The pattern(s) are chosen, and the yarns arrived on Tuesday. Next up is swatching, measuring, and casting on my "shocking" Edwardian turtleneck sweater.

Friday, November 01, 2019

Dress Journal #12: "Ski" Clothes for the Non-Skier

Snowshoeing with a friend,
c.1910. It's a walk in the park!
     First, I should explain about skiing. I don't. I didn't, even when I did several decades ago. I am amazingly bad at Alpine-style skiing. (I'm extremely good at falling.) Some of it is because I'm as coordinated as a duck on land, and some of it is because I have a real fear of heights, which translates to "Oh my God, I'm going to slide right off this mountain!" I can almost manage the tiniest beginner slope--the one toddlers start on--without falling.
Your grandma's snowshoes.
Old-fashioned but efficient.
     That inability to slide down a mountain with a couple sticks tied to my feet does not mean that I dislike the mountains or snow. I love the cold, crisp air and deep blue skies of a sunny day in the mountains, and as long as I don't have to shovel it, I think snow is pretty amazing. That's one of the real joys of living in California: as long as we get a "typical" wet winter, there's lots of snow in the Sierras, the Tehachapis, the San Gabriels, and the San Bernardino mountains, and I can be up to my expectations in white stuff in just a couple hours.
     So, if Alpine-style skiing is out, what else can a girl do, beyond making snow angels? Two activities come to mind: snowshoeing, and cross-country (aka "Nordic-style") skiing. Neither involves sliding at some rate of speed, both are relatively easy (and inexpensive) to learn and do, and there are good places to do either within a couple hours of home.
Modern snowshoes.
Strap 'em on and off you go!
     Snowshoeing has changed a lot in the last 40 years. Where "snowshoeing" once meant strapping something like tennis rackets to your winter boots, then hoping you didn't get your tails crossed up, modern snowshoes are more like miniature snowboards and clip right onto your boots. Add a set of trekking poles with snow baskets, and you're off on a hike. (Of course, if you're into the more traditional, Faber still makes snowshoes).
     The equipment for cross-country skiing hasn't changed as much as the clothing. Where cross-country skiing was once a slower, more "genteel" way of skiing, it now features skin-tight spandex more often seen on winter runners and cyclists. That makes sense--cross-country skiing is often described as "jogging with skis"--but the basic equipment hasn't changed: long, skinny skis with lightweight ski boots.
Cross-country skiing, c.1910.
     So how do we "roll back time," while still making something that is suitable for a day in the snow? Simple: we look at pictures. Lots of pictures. Fortunately, the rise of leisure activities coincided with the rise of simple photography for the masses, so there's a lot of material. I'm finding a decent number of exuberant young (and not so young) people having fun in the snow at the beginning of the 20th century. There's also some reading to do: contemporary travel guide recommendations; diaries; and letters. Finally, there's simply common sense: what works and what doesn't. My internal thermostat is set fairly high, so the layers need to be light enough to prevent overheating, but warm enough to prevent hypothermia.

     My list of what's needed:

  • A layer of cotton, silk, or lightweight wool underthings 
  • A lightweight athletic corset that allows me to move and breathe
  • A light wool "base layer" (e.g., a long-sleeved, high-necked sweater; wool bloomers or jodhpurs)
  • A medium wool "outer layer (e.g., an appropriate jacket and skirt)
  • Waterproof gaiters
  • Waterproof boots
  • Gloves
  • A dashing hat
  • Appropriate winter athletic equipment (snowshoes; cross-country skis; trekking poles; etc.)

Thursday, October 31, 2019

Dyeing in Fire Season

     At the end of last year, my inventory looked like a plague of locusts had attacked it. In a way, it had: it was a very successful season. I checked things last week and my entire inventory is:
  • 3 towels
  • 2 washcloths
  • 5 placemats
  • 1 handspun, handknit scarf
  • 8 skeins of handpainted and hand-dyed yarns
That small an inventory is enough to keep me from setting up the "shop" (my booth) at craft fairs and marketplaces this year. It also means I need to do a lot of work to have a decent inventory for next year.
     Top of the list was dyeing more skeins. I need the relative humidity to be low enough for the yarns to dry quickly, and warm enough to suit working outside in the dye yard. In California, this means dyeing in the fall, right before the winter rains start.
     Unfortunately, fall is also fire season. Fire season doesn't bother me. I grew up in what we now call the "Wildland-Urban Interface--we used to call it "the sticks"--and fall usually includes days of the powerful northeast winds known as "Santa Anas," "Sundowners," or "Diablos," depending on where in California you live. The winds blow, the fires burn the vegetation off the hills, and you try to stay out of the way.
     This year's fire season in Northern California is turning out to be more than a little frenetic. It doesn't help that a lot of the people living up here aren't familiar with fire ecology. It doesn't help that the local climate is becoming warmer and dryer. It doesn't help that pine bark beetles and sudden oak death have decimated the forests. And it doesn't help that the monopoly with a stranglehold on our utilities--Pacific Gas & Electric (PG&E)--hasn't been able to figure out how to manage their aging infrastucture. 
   
A rainbow of handpainted
sock yarns.
Last week started well, and by the middle of last week, I had a rainbow of handpainted skeins of sock yarn. Dyeing those skeins gave me a chance to use up a big bunch of already mixed dyes. 
     The weather continued to hold so, in spite of a forecast for wind, I started madder and brazilwood dyepots. Natural dyeing takes a lot more work, and madder is tricky--it takes several days to prepare the dye liquor, and temperature has to be monitored to get good color. The pots would be ready for dyeing on Sunday (normally a "work" day for me). By Saturday afternoon, everything was on track for a dye day, with yarns in mordant pots and tools at the ready. My cell phone kept chirping every couple hours with messages from PG&E about potential pre-emptive power outages, but every time I got one, I checked our address and we were in the clear. That wasn't surprising--I'm in the middle of an urban area, and not anywhere near a canyon that can funnel winds. 
     Everything changed at 3:40 p.m., when the City declared a Water Emergency and immediately instituted mandatory water rationing. Wait! What?? It turned out that the Water Department never bothered to install back-up generators for their pump stations, so the only water available was what was in the water tanks. Twenty minutes later, PG&E and the Solano County Office of Emergency Services sent out messages that the power would be shut off, beginning at 6 p.m. I ran around the house, positioning emergency flashlights, cooking an early dinner, and worrying about that madder pot. Six o'clock came and went, and the power stayed on.
My hard-won naturally dyed skeins. From left to
right, madder; brazilwood; onionskins; coreopsis.
     The wind woke me up about 5 a.m.: sustained 20 mph, with gusts above 30 mph. No matter--that madder pot was ready to go, and it was going to go no matter what. I got the yarns in and dyed, pulled the pot from the fire, and left it to cool. Everything else was left for the next day, when the water was turned back on and rationing ended. Monday was smoky but less windy, so I was able to finish dyeing the onionskin and coreopsis skeins. 
     The yarns are done, but I really need to re-examine when I do my dyeing. Our power never did go out, and we were never in any sort of danger, but I don't like being left "high and dry," without a reliable water source. The yarns don't dry as quickly during our foggy summer months, but at least the power stays on and water comes out of the taps. 

Wednesday, October 30, 2019

Dress Journal #11: Ski Clothes!?!

     As I've posted in other places, I do not do things by half measures. I'm a firm believer that anything done well is worth overdoing, so my decision to start building historical costumes again is destined to be something.
     This all started last week, when I discovered that

  • Costume-Con 39 is scheduled for April 23-25, 2021, in San Jose
  • A friend is running the "Single Pattern Competition" at said convention

McCalls M2087
     Normally, I don't do competitive costuming, primarily because the thought of getting up on a stage and being judged by my peers is enough to make me lose my lunch. On the other hand, I'm at the point in my life where I simply don't care. There is no stage, no real presentations, and I can simply relax and have fun.
     There's also the matter of the pattern. The idea of the Single Pattern Competition is to work from a single or small group of patterns and make it your own. The patterns are chosen from the "Big Four" pattern companies (Simplicity; McCalls; Butterick; Vogue) and Folkwear, and then the sky is the limit. The pattern that caught my eye was McCall's M2087 from their "Cosplay by McCalls" line: it's an over-the-top fantasy coat-robe that looks completely ridiculous, and a lot like one of my bathrobes. It's that silly, so it needs to be rescued and recycled into something a bit more useful.
A self-portrait of Swedish photographer
Maya Beskow, around 1908.
     So what can be done with that silly a pattern? Some careful thought, a little research online and in some books, and I realized that this pattern is crying out to become...ski clothes. Not just any ski clothes, but something appropriate for an active American woman before World War I.
     I've got an idea, and I've got a pattern, but do I have the necessary materials? Stay tuned....

Tuesday, October 29, 2019

.....aaaaaaand we're back!

     Nearly four years is a long time to be quiet. A very long time. However, "quiet" doesn't mean "boring." My life in general has been insanely busy, and I haven't felt like posting about it. There it is.
     A brief recap: I went to Kauai; spent a couple months in Europe and on the high seas coming back to the U.S.; went to New Mexico (Santa Fe) and Nevada (Reno); lost my mom after a shortish illness; got the loom of my dreams; dyed, spun, wove, and knitted a lot.
      So now I'm back.

Sunday, February 21, 2016

Bermuda Buttercups

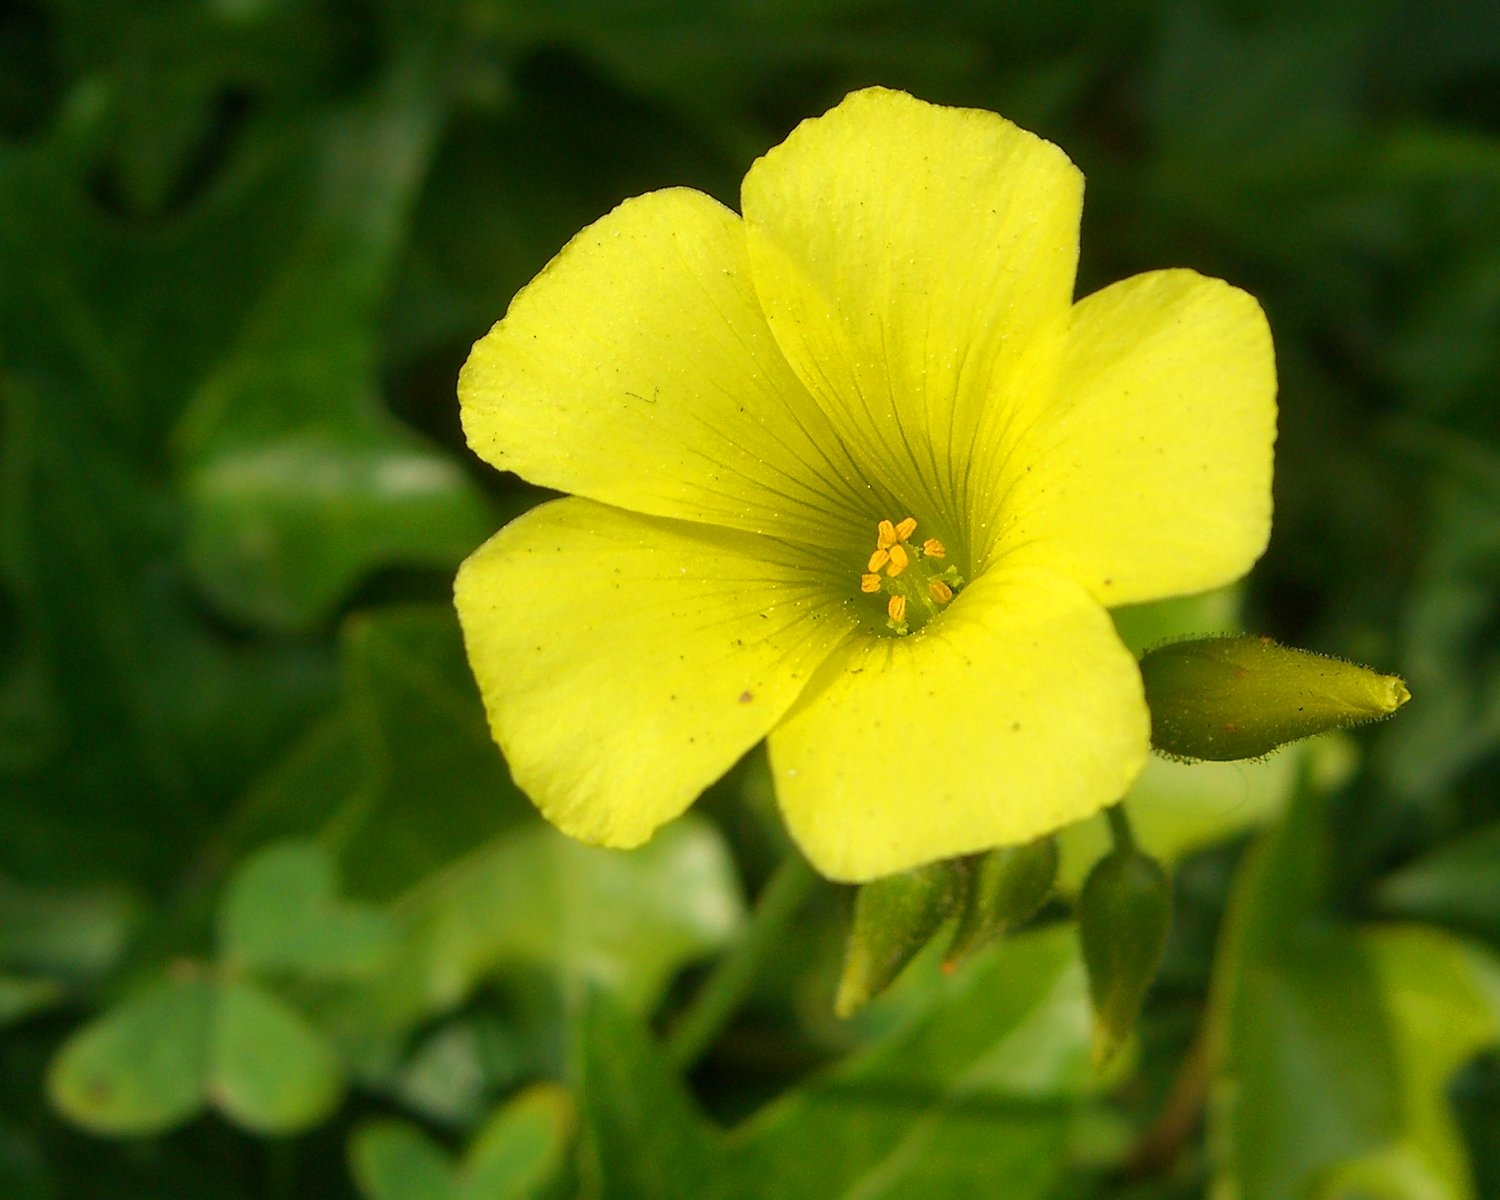
Oxalis pes-caprae--the
crabgrass of Northern California.
   Sunday was a very nice day--mid-60s, low humidity, lots of sunshine--so I spent part of the day pulling more weeds from my perennial bed and along the retaining walls. It's nice to see the yard start to wake up after a cold December and a wet January: the currant bush is starting to put out leaves, and my very confused purple irises (they've been in bloom since Halloween) are about to be joined by my "fancy" irises.
   The main weed I pull at this time of year is the crabgrass of the Bay Area, Oxalis pes-caprae. It has a lot of different names: Bermuda buttercup, Bermuda sorrel, African wood-sorrel, Cape sorrel, buttercup oxalis, sourgrass, English weed, and a bunch of names that can't be repeated. I've used a few of those, but around here it's usually referred to as "that damned oxalis."
   This is not your average wood sorrel. I have clumps of wood sorrel in shady spots all over the yard and I like its tiny pink and white flowers and tidy behavior. I've grown up with wood sorrel (we always called it "shamrocks"), and I love to chew on the stems for their sour, lemony flavor.
My yard is not this bad, but it's close.
   Bermuda buttercups start to show up during the dark, cold, days of December, when nobody wants to be outside pulling weeds, then explodes across the landscaping in January and February. It's everywhere: popping up in verdant lawns; covering bare ground where nothing is planted; even growing up between cracks in walks and walls. As soon as it gets a little sun, the plants send out tall stems with a tuft of yellow flowers at the end. The floral spectacular lasts about six weeks, then the plants die back to the ground, leaving a mess that has to be pulled up and raked away.
   Nothing kills Bermuda buttercups. I know this--I've tried everything from pre-emergent herbicides to chemical defoliants, and the blasted stuff just comes right back for more. I think it probably would withstand nuclear attack. It's particularly insidious because it propagates in two different ways. When conditions are right, and the plant is pollinated, it will produce large, brown, seeds that end up everywhere (I think the plant may shoot them across the yard). However, seeds are not Bermuda buttercups' regular method of spreading: the plants produce hundreds of tiny, peanut-sized, bulbs that become new plants that each produce hundreds of tiny, peanut-sized, bulbs. The plants force their roots--and bulbs--deep into the soil, so even when the plant is pulled up, the bulbs stay in the ground. As a result, I have Bermuda buttercups everywhere: front yard, back yard, in potted plants and raised beds that have nothing but purchased potting soil.
   I do not like Bermuda buttercups. I can, however, tolerate plants that are useful, and it turns out "that damned oxalis" has a couple of uses. The first one is in salads. When the yard is full of plants, I'll pull a handful or two of leafy stems, give them a good rinse, and strip the leaves for the salad bowl. It adds a bright, lemony, note to the salad.
   The second use is that it's a dye plant. Ida Grae, in her book Nature's Colors, described it as a dye plant, but a previous attempt didn't produce any results. I tried again last week: I don't know if earlier in the season is better, or the water pH was different, but this time, it worked. I mordanted 250g of yarns with 10% alum and 5% cream of tartar, then simmered the yarns for about 45 minutes in a dye liquor made of 250g of Bermuda buttercup flowers and a gallon of tap water. I got a cool yellow on some handspun llanwenog, and a brighter yellow on the wool/nylon sock yarn.
Gold, yellow, and cool yellow--
all from the same dye pot.
   The big surprise came when I change the pH of the water the yarn was in. I set one skein of sock yarn aside, then soaked it in a "push" bath of 1/4-cup household ammonia in a gallon of water for about 15 minutes. That was all it took to turn the yarn a gorgeous gold.
   All in all, I'm pretty pleased with the results of my first experiments with Bermuda buttercups. I picked another 185g as I was pulling weeds: 100g are spread on a cookie sheet to dry, while the other 85g were packed into a ZipLoc bag and tossed in the freezer. I want to see if the color will still hold through being dried or frozen. If it does, I'll be able to pick, dry, and store the flowers until my regular dyeing sessions during the summer. Who knows? I might start to like Bermuda buttercups.

On the loom: Still threading heddles for the upholstery fabric.

On the needles: Bit of Magic scarf out of Plymouth Happy Feet; Number 27 socks, out of ice-dyed Valley Franklin sock yarn.
  

Monday, February 15, 2016

A Box of Sox

A box of handknit socks.
   I'm the first to admit it: I like socks. I especially like handknit wool socks. During a normal California "winter," when the daytime temperatures drop below 60 degrees, I pretty much live in handknit socks. It's a matter of survival: the wood floors are cold (common in an historic home), and I don't like wearing shoes (I wear Birkenstocks except when it's wet).
   I also like to knit socks. Socks are easy, fast, colorful, and at the end of the process, I have a pair of (mostly) matching sweaters for my perpetually chilly feet. After knitting a couple dozen pairs of socks in the past seven years, I have sock-knitting down to a system: 2 US#2 circular needles; figure-8/"magic" cast on; either a "flat" or "star" toe; increases to 60 stitches, then knit plain until 60 rows from the cast-on. I now use a short-row (aka "Fleegle") heel, then knit the leg until the sock (or stocking) is as long as I want: if it's just standard socks, I knit the leg until it's as long as the foot, then do a couple inches of 3x3 ribbing before using a super-stretchy bind-off. It takes me 30-40 hours to knit a pair of socks--spread out over consecutive evenings, it's a pair of socks every 7-10 days.
   As a result of my love for sock-knitting, I have quite a collection of socks. They are neatly stored in a large box in the bedroom, paired up and folded so I can pick through them easily. There have been a few discards over the year. The first pair of socks I knitted--out of Patons Classic Wool--suffered the usual fate of all-wool socks: an accidental trip through the washer and dryer. I'm sure they made a very nice pair of slippers for some child. Another early pair was knit of 100% alpaca yarn. A word of warning--alpaca does not work for socks. I have no use for size 14 socks, so they went away. The latest sock purge were the pairs with "afterthought" heels. I like the afterthought heel, especially for yarns that make interesting patterns, but I can't do a Kitchener stitch to close the heel to save my life. As a result, those socks had a 3-needle bind-off that put a seam right at the bottom of my heel. They weren't comfortable, and now they're gone.
   The periodic sock purge still leaves me with  handknit socks and stockings. I have blue and green striped stockings, made with naturally-dyed yarns. I have a pair of truly wild self-striping variegated stockings made from handspun. I have tall socks for wearing with hiking boots, and regular socks for wearing with sandals (and tennis shoes, if forced). However, a sock purge also means I have an excuse to knit more socks.
Number 26.
   The current pair ("Number 26") are out of Paton Kroy FX, in "Clover Colors." I'm revisiting this yarn and colorway: I bought a couple skeins in 2010, but turned them into a shawlette in late 2013. Oddly, the shawl doesn't look anything like the socks--you wouldn't guess it's the same yarn, even when placed side by side. In fact, the socks are only marginally alike, even though both skeins are (theoretically) from the same dyelot. Fortunately, it's no big deal--I have no plans to wear the shawlette and socks at the same time--and I'll have one more pair of socks for the box.

On the Loom: 15 yards of 6-shaft broken twill out of Astra 10/2 cotton, on Mongo. The Gem is nekkid, in preparation for a doup leno workshop in 7 weeks.

On the Needles: Number 26 socks (see above).

Sunday, January 31, 2016

Looming Badassery

   I will admit it: I have a lot of faults. I'm lazy, I occasionally have a bit too much to drink, I like sweets and snack foods far too much, and I nearly always put fun before what I should be doing. I am also, at times, like former president Jimmy Carter: I have lust in my heart for a bright, shiny, very fancy...loom.
   For most of history, looms were pretty much looms. They had treadles, heddles, beams, and weaving on them was pretty straight-forward: once warped, it was up to the weaver to make the magic of cloth happen. Everything relied on the weaver's skill in stepping on the treadles in the right order, throwing the shuttle, and beating the weft at just the right time with just the right amount of force to put the weft into place and change to the next shed for the next pass of the shuttle. That's how weaving was--yes, there were fancy drawlooms for weaving brocades, and eventually jacquard and dobby looms, and fly shuttles for weaving wider cloths, but to most weavers, "loom" meant the beast with four or eight (or more) shafts, treadles, and a beater. The biggest advance came in the 1930s, when E.E. Gilmore and L.W. Macomber independently came up with designs for rising shed "jack" looms.
The AVL A-Series Loom. 
   This began to change in the 1980s with the advent of computerized, more automated, looms. In late 1981, Ahrens & Violette Looms changed their name to AVL and introduced the first of their mechanical dobby looms. It was a marvel: 16 shafts, dobby chains that could be pegged up with any treadling sequence (no more treadling errors), automatic warp tensioning, and a fly shuttle for weaving really wide cloth really fast. AVL's ads claimed that their loom "enables you to produce beautiful professional quality fabrics as much as 8 to 10 times faster than on a conventional loom..." AVL struck gold, and they've never looked back. These days, big, fancy, AVL looms are ubiquitious in production weavers' studios, and it's easy to understand why--it's pretty nice to design a complex piece of fabric, then sit down and let the loom do all the "hard" work of weaving, including raising the shafts and throwing the shuttles.
   It's tempting. It's especially tempting on those days when I'm having to crawl into the loom for the third or fourth time to change a tie-up, or weaving a long warp when my various little aches and pains are bugging me.
Mongo--my 16S/23T Macomber B-4
   Mongo (my beloved floor loom) is big, old, and completely manual. It's a relic from the last great age of weaving (the 1960s and '70s): Mongo was built by Macomber Looms in 1970 as a 56", 16-shaft, 22-treadle, jack loom with double warp beams, and is still mostly in the original configuration: I swapped out the plain friction-brake warp beam for a sectional warp beam, added an extra treadle (long story short, I miscounted the treadles when I was putting the loom back together after moving), and installed LED strip-lighting on the castle to better see what I'm doing.
   There's a certain amount of badassery that goes along with weaving on a really big, completely manual loom. First, there's the feeling of power that comes with operating a big, heavy, piece of equipment. It's like operating power tools or a big piece of construction equipment (such as a back-hoe): you are in charge of this monster, and it's up to you to keep yourself safe and the job on task.
The AVL Industrial Dobby Loom.
Warp it up, turn it on, and go get a coffee
while it does all the work. 
   There is also the issue of what constitutes "handweaving." There's no question that weaving on a completely manual loom is handweaving. I'm down with that: when I'm really in the weaving zone, my feet dance across the treadles, the shuttle zips along the race, and flawless cloth magically appears in front of me. But is it still "handweaving" when the computer is telling the loom what shafts go up or down next? Or when all the weaver has to do is pull the fly shuttle cord and the beater to create cloth? Everyone has a different answer for those questions, but my answer tends toward "no": that arcane knowledge that is part of the magic of turning yarn into cloth isn't really necessary if the loom is so automated that it almost doesn't need a human.
   So I stick with my Mongo. There are some things I simply can't do on a loom this big: I can't weave more than about 46" in the reed; and I can't lift more than five shafts on one treadle. But when I sit down and throw a shuttle at Mongo, I really feel like I'm weaving, and connecting with all those past weavers who liked good cloth and straight selvedges.

On the looms: Nothing! I cut off a set of samples for upholstery fabric, then wove off the rest as a 2-color bumberet.


On the needles: Just a pair of socks out of Paton Kroy FX. Instead of knitting, I've been covering a brick with needlepoint--it will serve as both a doorstop and a heel rest for my electric bobbin winder's foot pedal.
   

Thursday, January 21, 2016

Cracking Up

The crackle scarf
   Forgive me, as I am a bad blogger--it's been a month since my last update. This always happens in November and December: I get busy with the holidays, and blogging gets shoved to the back burner. Before I know it, it's the middle January.
   The fancy twill towels and the crackle scarf are finished! I don't like having warps on either of the looms, and 2015 turned out to be a year in which I got a lot less weaving done than I really like: between broken looms and a broken weaver, my productivity went way down, and some of the warps felt like "dogs" (weaver-speak for a never-ending warp) long before the end knots came up over the back beam.
   Oddly, the crackle scarf was particularly troublesome. I normally don't have a problem with a weave, but this one was a bear. Some of the problem was probably with the design: 4 rotating blocks, each with a supplemental weft in the middle block and another supplemental weft, in a different color, in between each block. It looks beautiful, and reminds me of the spiraling flower spikes of Pride of Madeira, but keeping track of pattern weft, ground weft, two supplemental wefts, which block I was on, and making sure the selvedges were nice was enough to drive a saint to sin. As it was, I found three treadling errors as I was pressing and clipping ends after wet-finishing the scarf. Since it's flawed, I can't sell it, but there's no reason I can enjoy it this winter.
   Because it took so long to weave the crackle scarf, and a couple of samples, I opted to weave off the rest of the warp in plainweave, with the main warp color as the weft. It turned out to be a pretty nice-looking fabric: the bright red-orange and olive green pinstripes contrast nicely with the deep blue. At this point, the 3 1/2 yards I wove are wet-finished: I may turn some of it into a "pocket scarf."
An undulating twill, out of alpaca-silk.
   I finished the crackle warp on Monday; I finished beaming the next warp on Mongo this afternoon. I've been challenged to weave six projects in 2016 that use only yarns in my stash, and this is the first. The warp is 4 1/4 yards of Malabrigo Baby Silkpaca Lace, in the "Zarzamora" colorway, that I bought with a gift certificate I won at the Marin County Fair in 2012 for the "Fall Leave at Sunset" shawl. It's going to be paired with a weft of periwinkle blue alpaca/silk that I picked up at Stitches West a few years ago as a magpie purchase from the WEBS booth. The design is for an 8-shaft undulating twill that looks like ripples. There's enough warp to weave a scarf and a couple nice samples.

On the looms: "Ripples" scarf, out of 2/15 Baby Silkpaca and 2/14 alpaca/silk. The Gem is nekkid.

On the needles: Nothing. I finished another pair of socks and a set of mitts over the holidays, and I'm currently hemming the Fancy Twills napkins.

Update: This was written back on January 14, but I was so late in putting in the photos, the "Ripples" scarf is off the loom, and I've beamed 4.5 yards of 10/2 mercerized cotton to weave some samples for upholstery fabric.

Monday, December 14, 2015

Wrapping Up the Year

Number 23 Socks
Number 24 Socks
   The end of the year is approaching fast, and I'm trying to finish the outstanding Works in Progress (WIPs) before midnight on December 31. I'm making headway. The Number 23 and Number 24 socks are finished, although I ended up frogging the Number 23 Socks (that yarn deserves a better sock pattern). I've nearly finished the Winter in California scarf. I'm slogging through the Fancy Twill Napkins: I want that warp done so we can move my workshop loom out of the dining room for Christmas dinner and a holiday open house. There's a warp for a couple of crackle scarves on Mongo, which will be the last project I work on this year.
   Meanwhile, I've baked mountains of cookies. I still need to clean thoroughly, decorate the house for the holidays, write out the holiday cards, mail a couple of packages, and wrap everything that will be under the tree on Christmas morning. I just need to keep plugging away, and I will get it all done.
Crackle Scarves, inspired by
Pride of Madeira

Fancy Twill Napkins

Winter in California Scarf

Tuesday, December 01, 2015

Someone's in the Kitchen (and Up-Valley)

   Over the years, I've been in long discussions that revolve around a mental game: Vocation, Avocation, Hobby. Basically, your vocation is what you do to make money; your avocation is what you do for love, but also what you'd like to for money; and a hobby is what you do, but don't love it enough (or love it too much) to get paid for doing it. Most recently, my vocation was teaching (what I did for a living), and my avocation was the fiber and textile arts (what I would be willing to do for money). That has changed, and now my avocation is my vocation.
   That brings me to my "hobby": food. I like to cook. Correction: I love to cook. Not enough to do it for other people--except on an occasional basis--but enough that it's been a major hobby most of my life. I'm also blessed with an excellent palate, a curious soul, and a large collection of cookbooks, so I'm not boasting when I state that I'm a very good cook. My kitchen is lined with framed culinary awards , and I've taken just enough (mostly professional) cooking classes that I can turn out everything from a cozy dinner for two to a sumptuous banquet for two hundred. I also have a great place to "play:" when the house was turned from a duplex into a single-family home, the downstairs unit's kitchen and bath were demolished to make way for a large (12'x18'), eat-in kitchen and a tiny downstairs bath. After living here nearly ten years, I designed a complete remodel of the kitchen and adjoining mud room, and we spent about 10 months creating efficient, comfortable storage and work spaces. It's pretty nice: I have a walk-in pantry with access to the dye yard and the grills; lots of cupboard space (something sadly lacking before the remodel); an 8-foot island with electrical outlets and a small "breakfast bar" for meals; good appliances that can handle my style of cooking; and a French country theme. We have a dining room, but we eat most of our meals in the kitchen.
   At this time of year, the kitchen takes center stage. It begins as the weather changes from October's heat to November's crisp days and cold nights. Like a squirrel preparing for winter, I take stock of what's in the pantry, and what I'm going to need to turn out pies, cakes, cookies, savory delights of all kinds, two large meals (Thanksgiving and Christmas), and the food for our annual "open house" cocktail party. There are lists, and lists of lists, and cookbooks and recipes spread everywhere as I design menus and look for bargains on ingredients. By early December, the pantry cupboards, pantry freezer, and the kitchen refrigerator are crammed, and extra bottles (and cases) of wines and spirits litter the dining room sideboard and window seat.
   The week of Thanksgiving marks the start of the holiday cooking. This year, Thanksgiving was just the two of us, so I cut back a bit on the preparations: a brined and roasted game hen, paired with roasted new potatoes, and Brussels sprouts with chestnuts and pancetta. Some appetizers before, and a mince pie (with hard sauce, of course) after, all washed down with a lovely wine (Saintsbury 2006 Brown Ranch Chardonnay), and we had a fine feast.
The old press house, Napa Valley Olive Oil Mfg. Co.
in St. Helena. The old olive press is now used for
displaying flavored olive oils.
   Other people can spend Black Friday in crowded shopping malls: our tradition is to head "up Valley" for comestibles. Our first stop is usually the Napa Valley Olive Oil Mfg. Co. in St. Helena. Tucked away on a side street near downtown, the Guidi family has been making the best local extra virgin olive oil since 1931. They sell it--along with a selection of Italian groceries--out of the old press house. One grabs a little basket and shops: olive oils, both plain and flavor-infused (I'm partial to the garlic-infused); squat bottles of balsamic vinegar; pastas and canned goods from Italy; candies; paper-wrapped amaretti cookies; cheeses; and olives. This year, we came away with two bottles of garlic-infused EVOO, a quart of plain EVOO, a tub of feta cheese-stuffed green olives, and a slab of torrone, that luscious, nut-filled nougat.
   After a stop at
Taylor's RefresherGott's Roadside (OK, who am I kidding--it's Taylor's) for al fresco burgers, garlic fries, and a glass of wine, it's on to Dean and Deluca. That world-famous purveyor of overpriced products opened a "Napa" branch in St. Helena a while back, and it's fun to wander around, watch the tourists spend too much on kitchen gadgets and picnic nibbles, and buy the occasional item I can't get anywhere else. I particularly like their cocoa for baking, so there's a fresh tin in the pantry.
Shackford's. The best place for kitchen stuff in the Bay Area.
   A couple side-trips to wineries to pick up waiting orders or try new selections, and we work our way back down Hwy 29 to Napa and Shackford's Kitchen Store. Let the tourists and wine country parvenu spend their money at Dean & Deluca or NapaStyle: locals know the only place to pick up needed kitchen utensils is Shackford's. Started about the same time Chuck Williams took over the hardware store in Sonoma, Shackford's is what Williams-Sonoma was: a local store that specializes in good housewares at reasonable prices. Fancy and "fou-fou" it's not: cramped, ill-lit, and sometimes it's hard to find things, but if Shackford's doesn't carry it, you probably don't need it. The best time to visit Shackford's is mid-afternoon: the tourists have moved on to wine tastings, and the staff have time to talk, and swap recipes and cooking techniques. This year's haul included three new paring knives (easier to replace than sharpen), two new Y-peelers, a couple small souffle dishes for French onion soup, a new tool for cleaning the microwave oven, a couple of olive wood non-directional spatulas, and "sprinkles" for this year's Christmas cookies.
Sometimes, I talk to grapes. Tast-
ing among the casks of Pinot Noir
and Chardonnay at Saintsbury.
   Some years, our Up-Valley foraging trip includes a stop at the Oxbow Public Market, Trader Joe's, or a couple more wineries. This year, we finished up at Saintsbury in the Carneros. Started and owned by David Graves and Richard Ward, this small winery produces pinot noir and chardonnay in the Burgundian style. Yep--they're that good. We had a half-case of different bottles waiting for us to pick up; after sampling some of the newly-released wines, we came away with more than a case to lay down in the cellar for future meals.
   So here we are, with a well-stocked pantry, spice cabinet, freezer, and wine cellar. I'm ready.

Places I mentioned:

Napa Valley Olive Oil Mfg. Co. 835 Charter Oak Ave., St. Helena. (707) 963-4173.
Taylor's Refresher/Gott's Roadside. 933 Main St., St. Helena. (707) 963-3486.
Dean & Deluca. 607 St. Helena Hwy (Hwy 29), St. Helena. (707) 967-9980.
Trader Joe's Market. 3654 Bel Aire Plaza, Napa. (707) 256-0806.
Shackford's Kitchen Store. 1350 Main St., Napa. (707) 226-2132.
Oxbow Public Market. 610 & 644 First St., Napa. (707) 226-6529.
Saintsbury Winery. 1500 Los Carneros Ave., Napa. (707) 252-0592. (Wine tastings by appointment only, so call ahead.)


Monday, November 16, 2015

Studio Time

   I missed last weekend's post because I've been spending a great deal of time in studios--both mine and other people's. The weekend was...interesting...and pointed up some of the aspects of the local arts scene that drive me right out of my everlovin' mind.
   We have at least three (3) pretty active arts organizations in Vallejo: the Vallejo Community Arts Foundation (VCAF); the Vallejo Artists Alliance (VAA); and the Vallejo Waterfront Artists. All are full of pretty nice people, and all like to put on events to draw attention to the local arts scene, but nobody seems to coordinate with anyone else.
   Last weekend was a great example of non-coordination. The Vallejo Waterfront Artists sponsor the annual Vallejo Open Studios. This is a fairly big deal--most of the artists in town have live-work situations, so their studios aren't normally open to the public--and planning for it starts months in advance of the actual event. Open Studios is normally on the second weekend of November, which is usually a great time for a semi-outdoor event--we're past the heat of "Indian Summer," but the winter rains haven't started.
   Meanwhile, it was recognized by most of the arts community that we needed more than a once-a-year event, so the Vallejo Artists Alliance began the Vallejo ArtWalk in late 2013. ArtWalk is the second Friday of each month, and it usually draws a pretty decent crowd downtown to the galleries, studios, and street artists/vendors who set up.
   Two pretty nice arts-related events, put on by two groups that know each other really well. One would think the two groups would get together with their calendars and coordinate a massive, 3-day arts event. This should be a slam-dunk: it wasn't. Open Studios was held on Saturday and Sunday, November 7 and 8; ArtWalk was held the following Friday, November 13. A lot of people--including artists--participated in one event or the other, but not both. Had everything been on the same weekend, more artists would have had an excuse to open their studios early, or stay open over the weekend. It was a "missed opportunity."
   Don't get me wrong: I enjoyed Open Studios. We started our "arts day" early with coffee at Moschetti's, a local coffee roaster that opens to the public on Saturday mornings. It's become a favorite Saturday morning hang-out for a number of artists, and we usually stop by to have coffee, meet up with friends we don't otherwise see, and maybe pick up a pound or two of their incomparable coffee beans. After coffee, we pulled out our map and started visiting the outlying studios that were open. Along the way, we ran into friends and acquaintances, saw a lot of nice art, got some lunch from Picknicky's (a new local sandwich shop), then went to see more studios and galleries. I was struck by the relative lack of crowds, especially downtown. There are a lot of artists, studios, and galleries in downtown Vallejo, yet the sidewalks weren't crowded. Quite frankly, I've seen more people out during ArtWalk than I saw during Open Studios.
Summer Sunsets,
finally fringed.
   We wound up our evening at the "after party" thrown by the Coal Shed Studios Artists on Mare Island. They're a fun, interesting bunch of artists in a fun, funky space: a "repurposed" historic coal storage building on the waterfront, in the former Navy shipyard. The artists have created studio spaces and a small gallery out of the 8,000 square feet of the building, and this year they simply put the word out that people should bring their leftover drinks and nibbles for a bit of "wind-down" socializing. We brought a couple bottles of wine, and a few more bottles of fancy Italian sodas, and had a marvelous time eating, drinking, and chatting with all and sundry. It reminded me of some of the openings/parties I attended when I still lived in Los Angeles, and was the bright spot of the weekend.
A simple shrug
out of stash yarns.
   Unfortunately, being "out and about" doesn't get the cloth woven, so Sunday (and a lot of the last week) was spent in my own studio. It was a week for finishing things: a shawl that was woven last year finally has twisted fringe; all the towels are neatly hemmed and have their required labels; a "quick" shrug-sweater was finished off and immediately put to use. With those projects out of the way, I can focus on the next projects at hand.


On the looms: Fancy Twill Napkins, out of 8/2 cotton; Pride of Madeira Scarves, out of 3/2 and 10/2 cotton.

On the needles: Winter in California #1 Scarf, out of handspun wool, alpaca, mohair, silk blend; Number 23 Socks, out of Blue Moon Socks That Rock (STR) Mediumweight.


Monday, November 02, 2015

Really Good Stuff


   I missed last week's post because of two Sunday meetings. This week's post is word-skimpy as I don't want to bore with a rant on the commercialization of Halloween. So, it's limited to Really Good Stuff.

   Really Good Stuff #1: The return of Bloom County. Thank you Berkeley Breathed, for not just bringing back one of my favorite comic strips, but allowing it to reflect today's political and pop culture realities. This time around, the strip is only posted to Mr. Breathed's Facebook page (if you needed an excuse to get on Facebook, here it is); more than once, I've nearly spewed a mouthful of coffee onto my laptop when I've read that morning's gem. Life can't be all bad if Bill the Cat and Opus are once again running for president and vice-president.

   Really Good Stuff #2: Water falling from the sky. After four years of drought and record-setting temperatures, I think (along with hope and pray) that we're starting to see our normal winter weather. The pattern has already started: we got enough rain to wet the sidewalks on Wednesday, more rain is forecast for tonight, and another storm seems to be lining itself up to arrive next weekend. I'm more than ready for a cool, wet, winter.

   Really Good Stuff #3: The towels are off the loom. I have 32 towels to hem and label, but that very long warp is finally done. I've already started winding and beaming the warp for a couple of crackle weave scarves, and I'm working away on the fancy twill napkins so I can get them off the other loom pretty quickly.

   Really Good Stuff #4: Stephen's hat and scarf are off the needles. I motored through the scarf, then had enough yarn left over to make a matching hat. I'm on to making a simple shrug to wear in the studio when it's chilly, and to use up some of the millspun yarns in the stash.

On the looms: Fancy Twill Napkins out of 8/2 cotton; Pride of Madeira Scarves, out of 3/2 and 10/2 cotton.
On the needles: Stylishly Simple Shrug, out of EMU Superwash DK (from the stash).